
 Italiano
 Español
VPN (Virtual Private Network) is a technology that allows to extend a local network on a public network like the Internet. Using a VPN, a computer connected to the Internet can send and receive data from the computers inside the network as if it was directly connected.
A very powerful tool for today’s companies.
A VPN is easy to set up on Windows Server 2012 R2, just follow these steps and you’ll be ready (server side, we’ll talk about client configuration in the future).
1. Install the Remote Access role
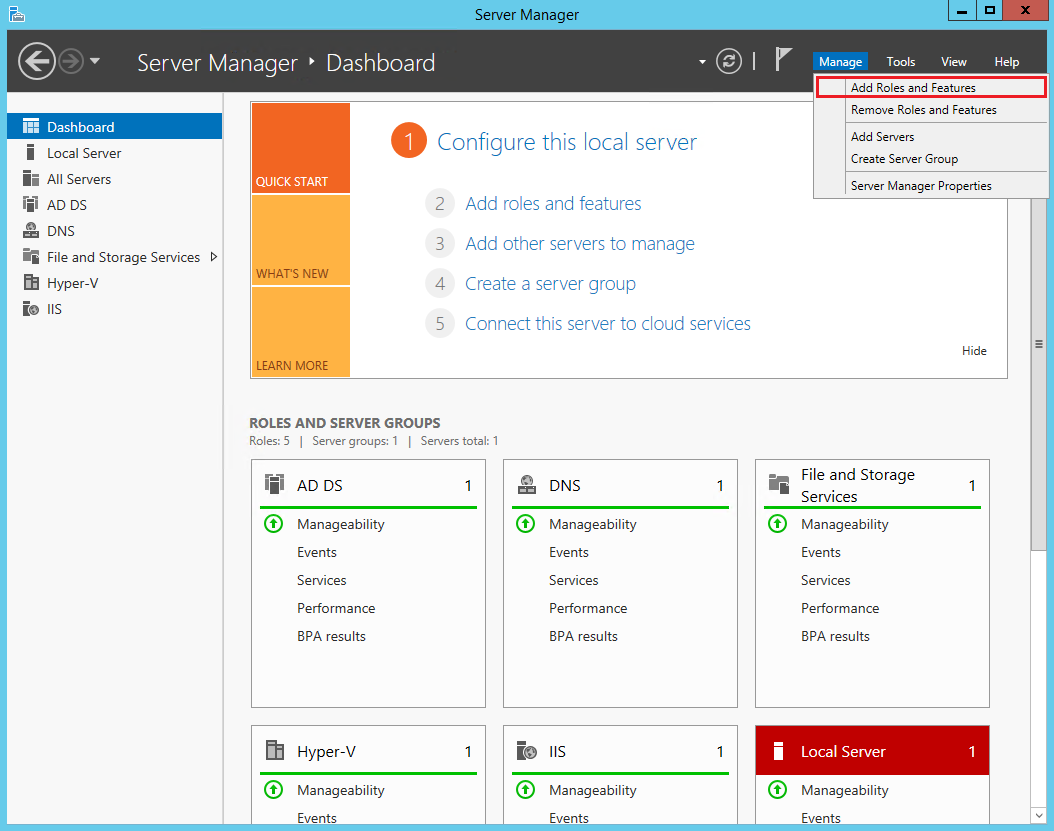
Open the Server Manager and click on Manage. Select Add Roles and Features:
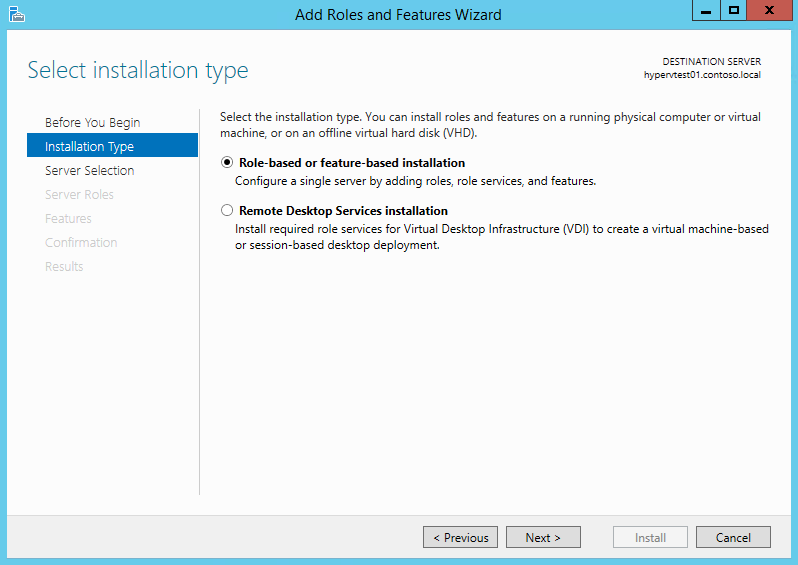
Click on Next until you reach the Roles tab:


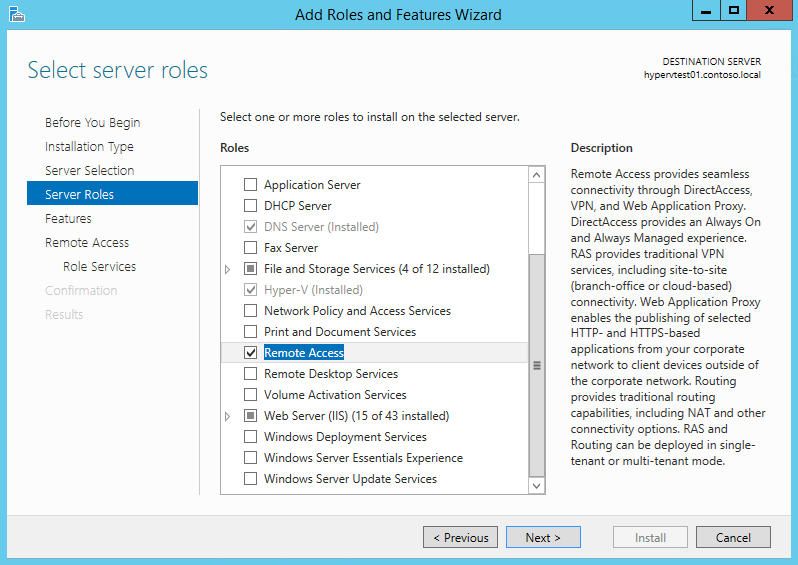
Now select Remote Access and click on Next:
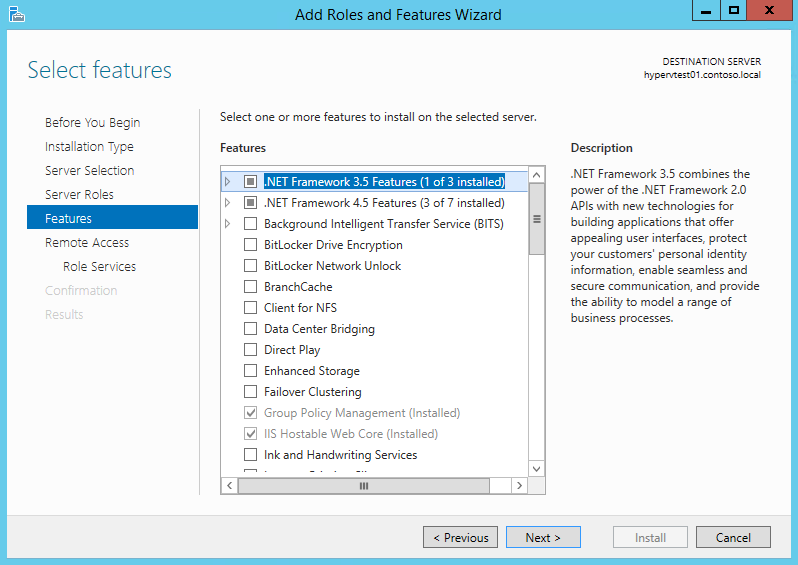
You don’t need to select anything from the Features tab, click on Next:
Just click on Next:
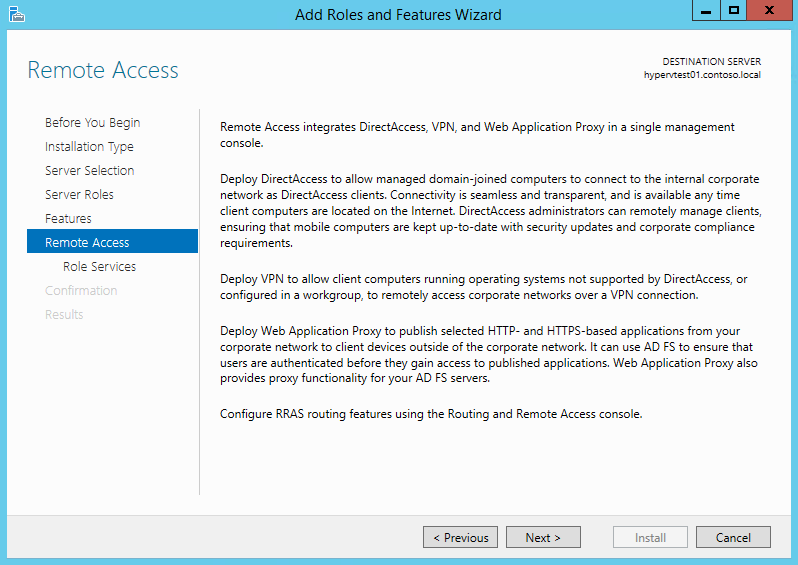
Select Direct Access and VPN (RAS):
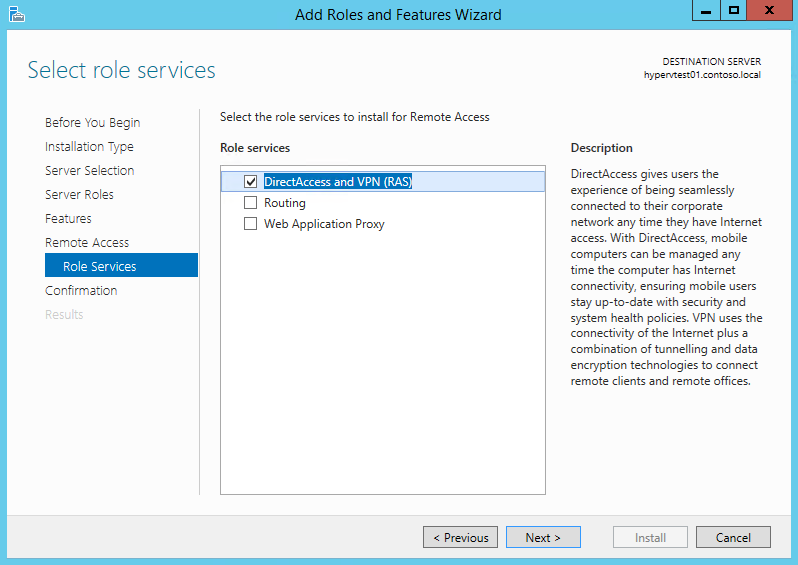
A dialog showing the missing dependencies will appear. Click on Add Features:

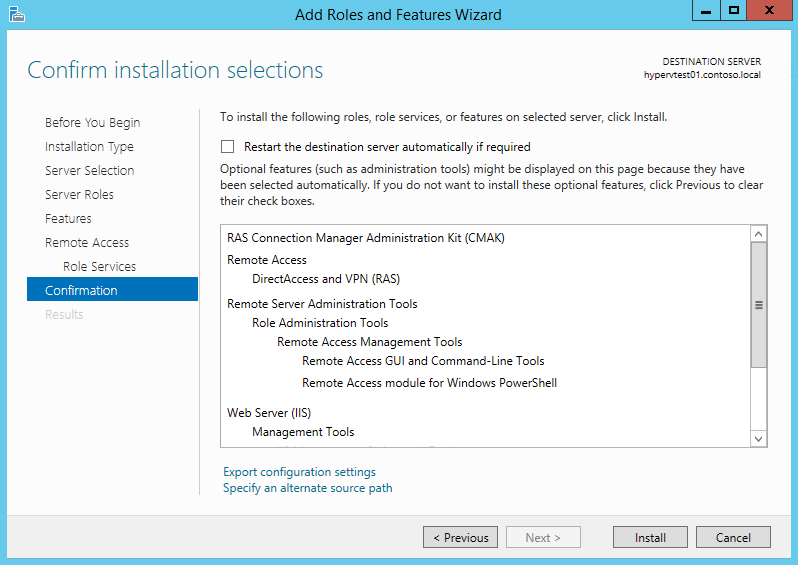
Install the Remote Access role. It will take some minutes:

2. Install and configure your VPN
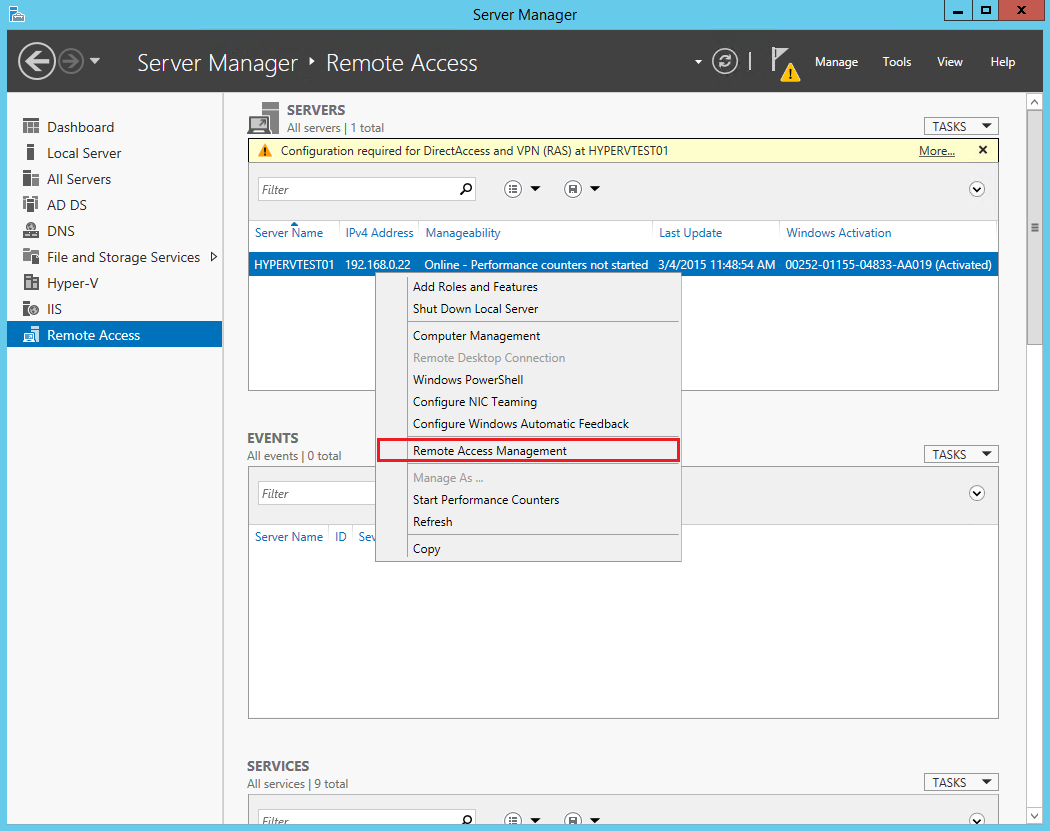
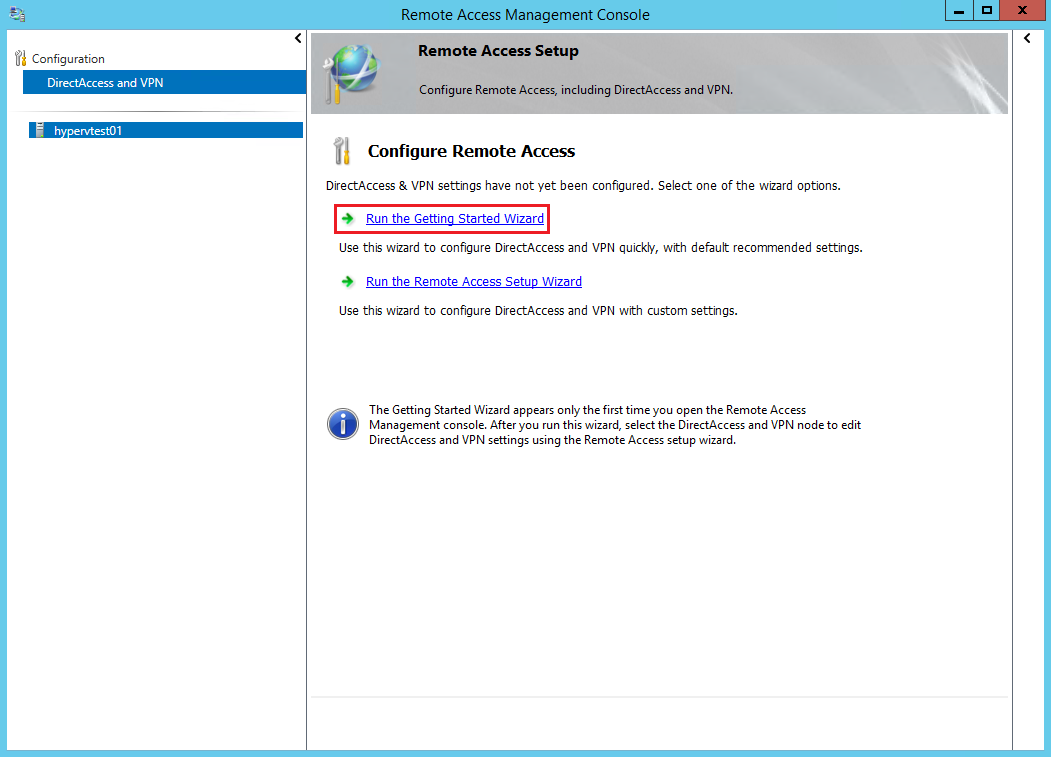
Go back to the Server Manager dashboard and click on Remote Access. Select your server and right-click on it, then click on Remote Access Management:
Run the Getting Started Wizard:
Press Deploy VPN onl