We’ve already seen how you can install IIS (Internet Information Services) on Windows 8.1 for testing purposes. Now, we’ll see how you can install IIS on a server machine, to host your website for production purposes.
There’s no much differences between the two procedures. The installation is quick and easy.
Step one: Install the Web Server (IIS) role
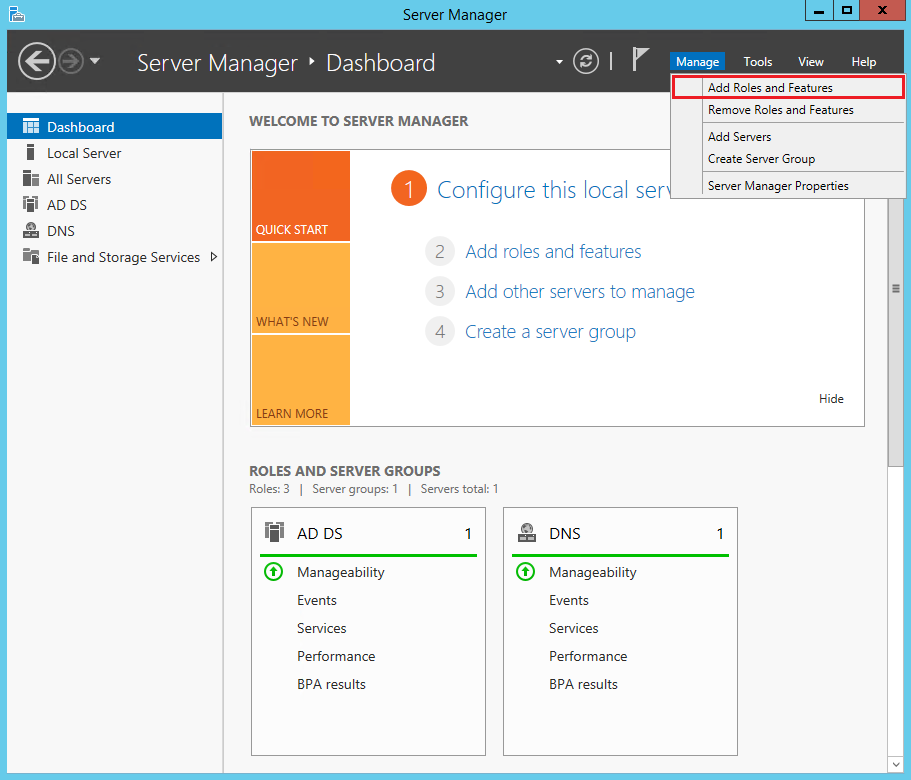
Open the Server Manager and click Add Roles and Features:
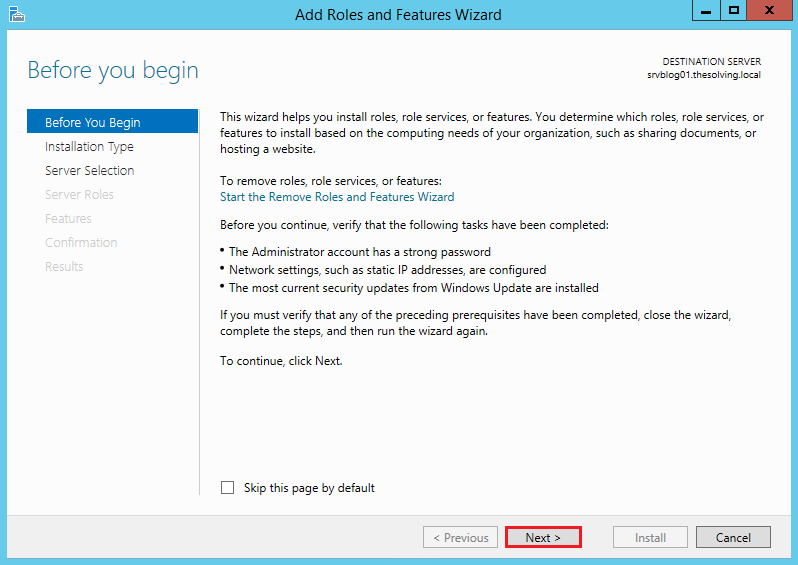
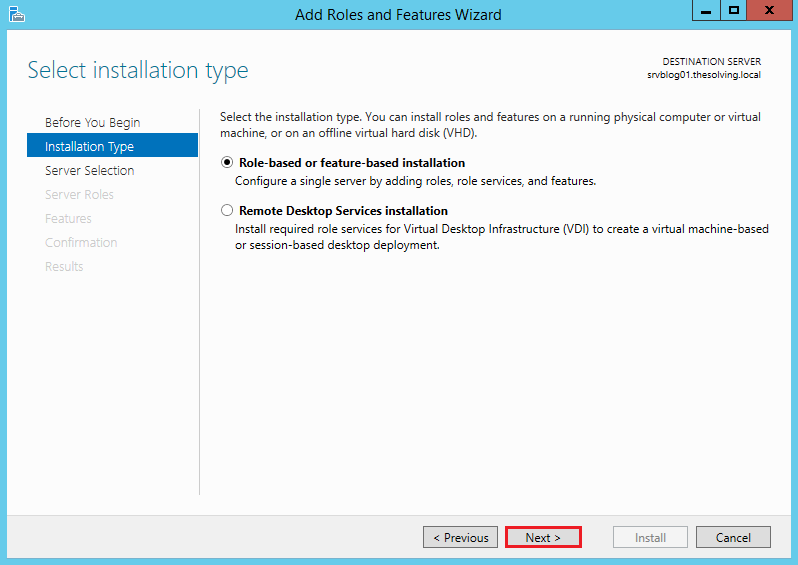
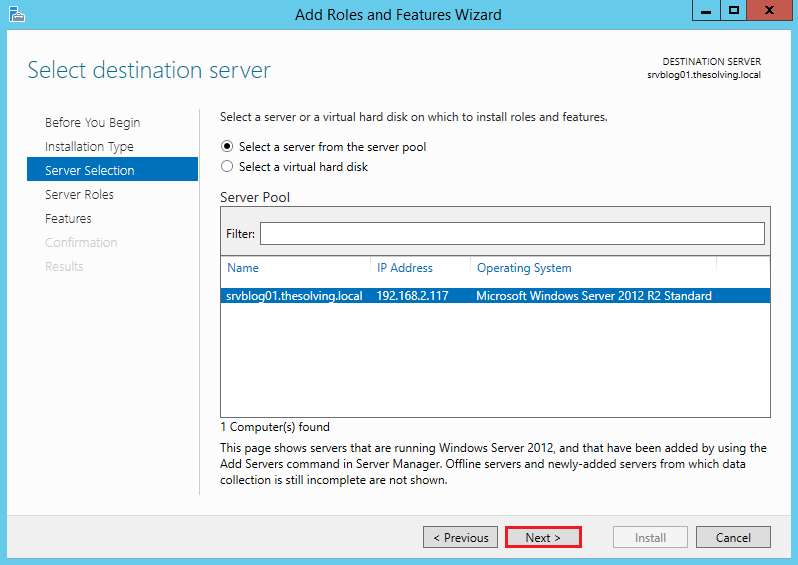
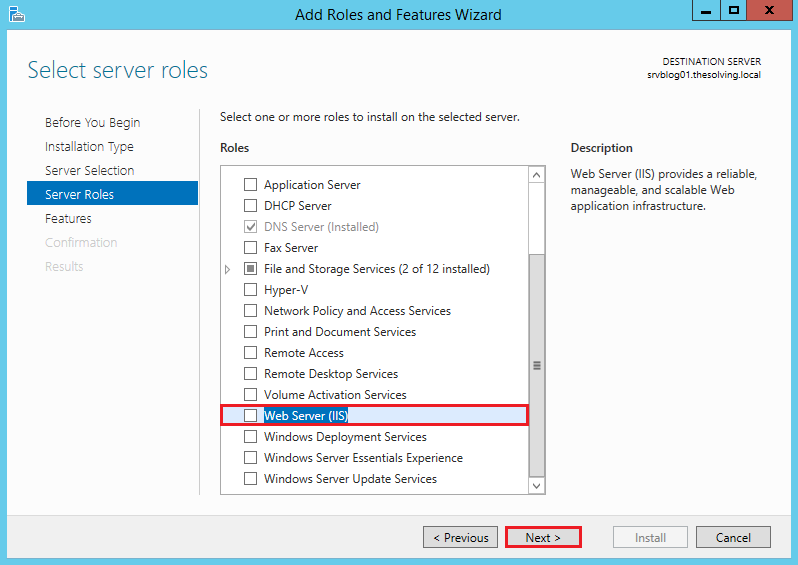
Go on until you reach the Server Roles tab:
Select Web Server (IIS):
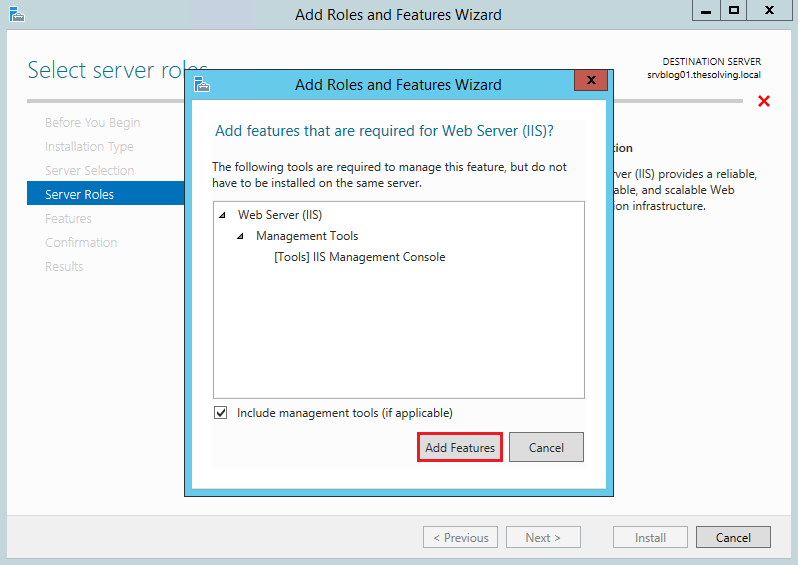
Click Add Features:
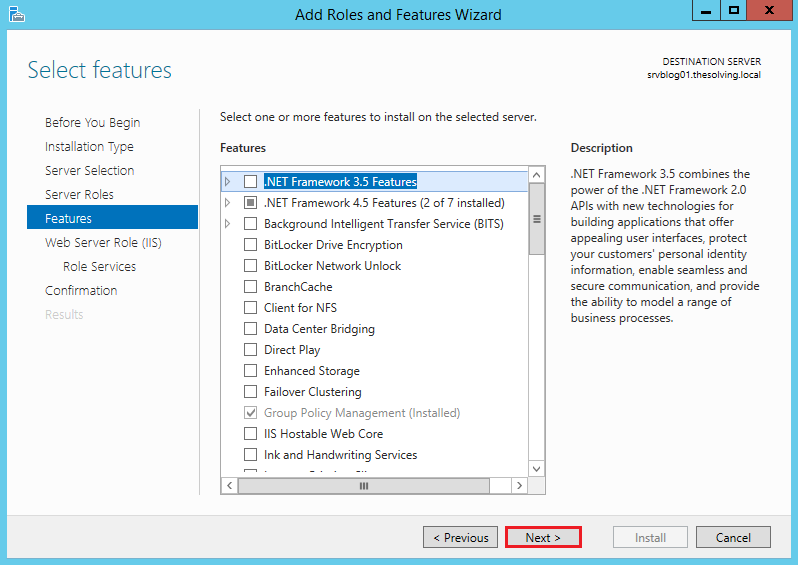
Ignore the Features tab and go on:
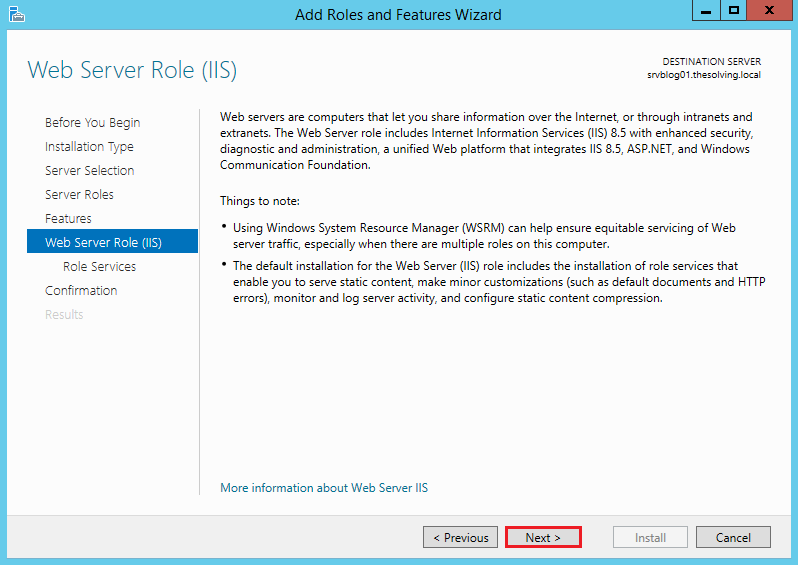
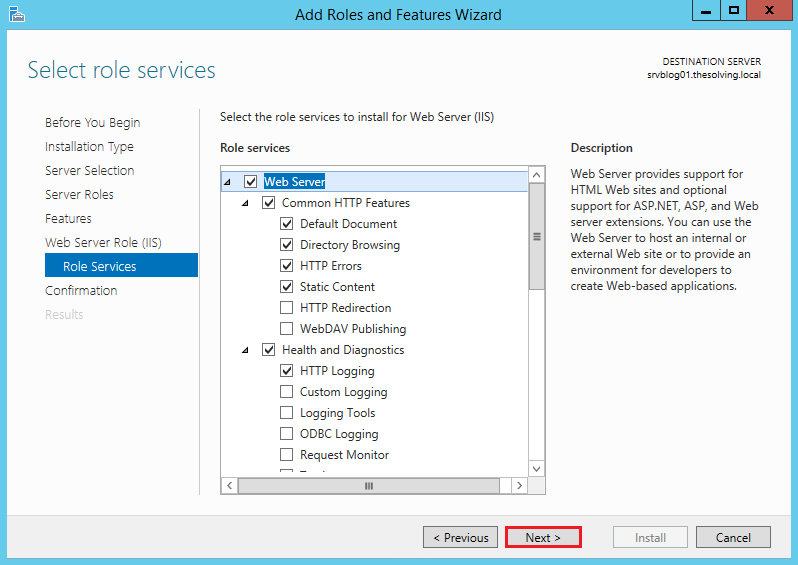
Click Next:
The default configuration will be fine. Click Next:
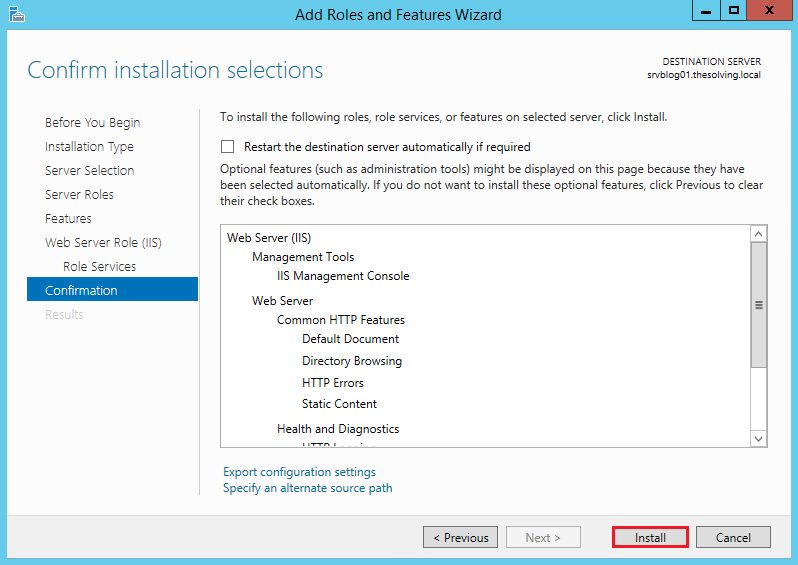
Click Install:
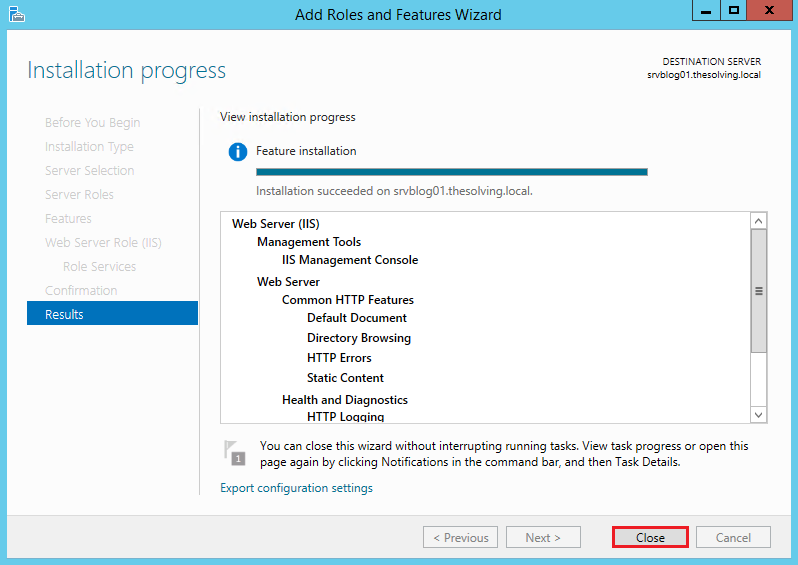
Installation completed!
Step two: Configure IIS
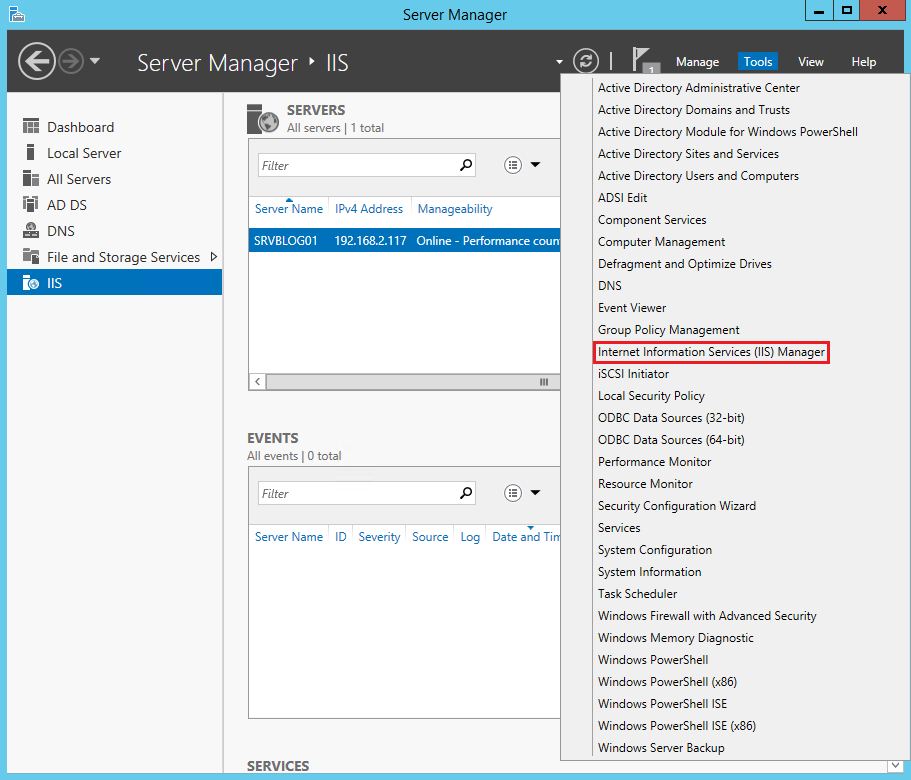
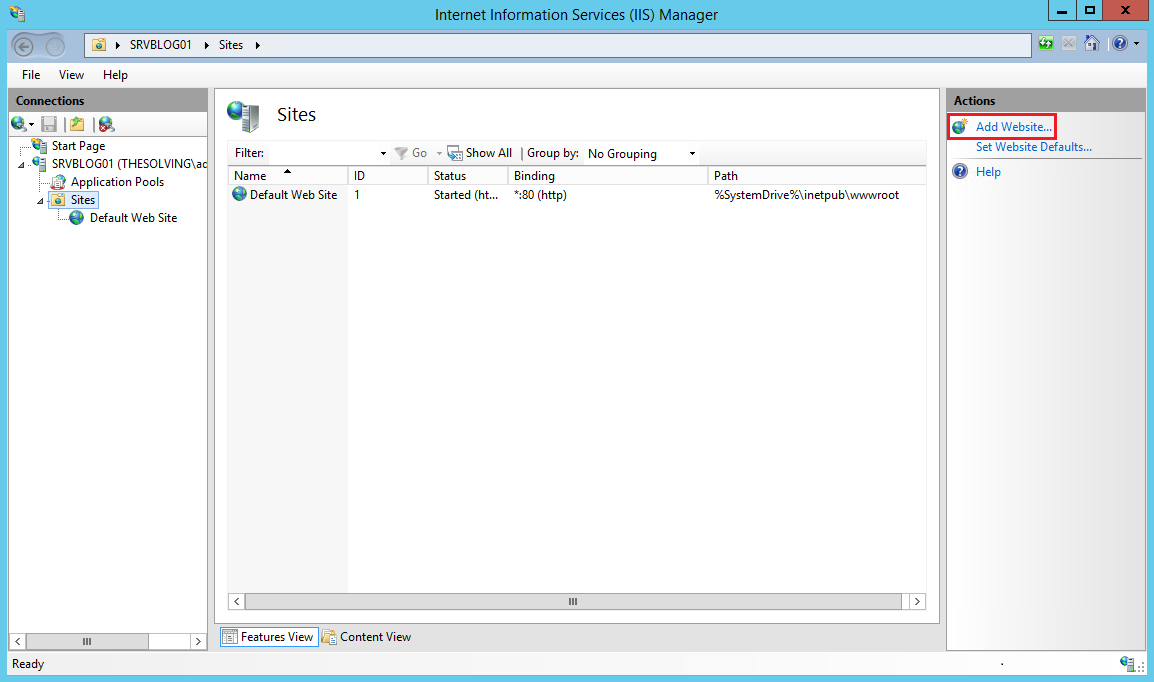
Go back to the Server Manager. Select Internet Information Services (IIS) Manager from the Tools menu:
Click Add Website:
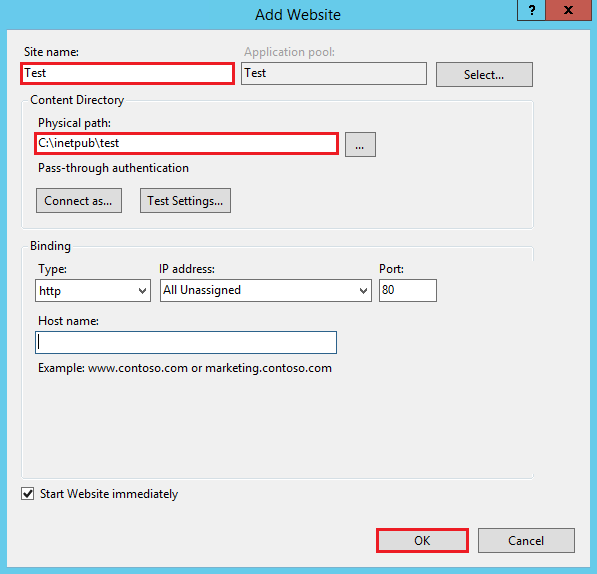
Specify at least the site name and path. Click Ok:
Your first site is ready to be accessed.
Read related articles
A Guide to PowerShell – part 3
Welcome to part 3 of 3 of The Solving A guide to PowerShell. Check also Part 1 and Part 2.
A Guide to PowerShell – part 2
Welcome to part 2 of 3 of The Solving A guide to PowerShell. Click here for Part 1 and Part
A Guide to PowerShell – part 1
Welcome to part 1 of 3 of The Solving A guide to PowerShell. Click here for Part 2 and Part

 Italiano
 Español
