VLANs or virtual LANs, are a great tool to segment LANs without having to build a complex and costly network infrastructure. Even with only a unique switch you can build a network with multiple broadcast domains.
Other advantages of adopting VLANs are scalability, network performance, improved efficiency and better security.
Thanks to HP and its 1910 Switch Series, we have an affordable solution to implement VLANs.
We’ll show you how to segment your LAN into VLANs with these switches.
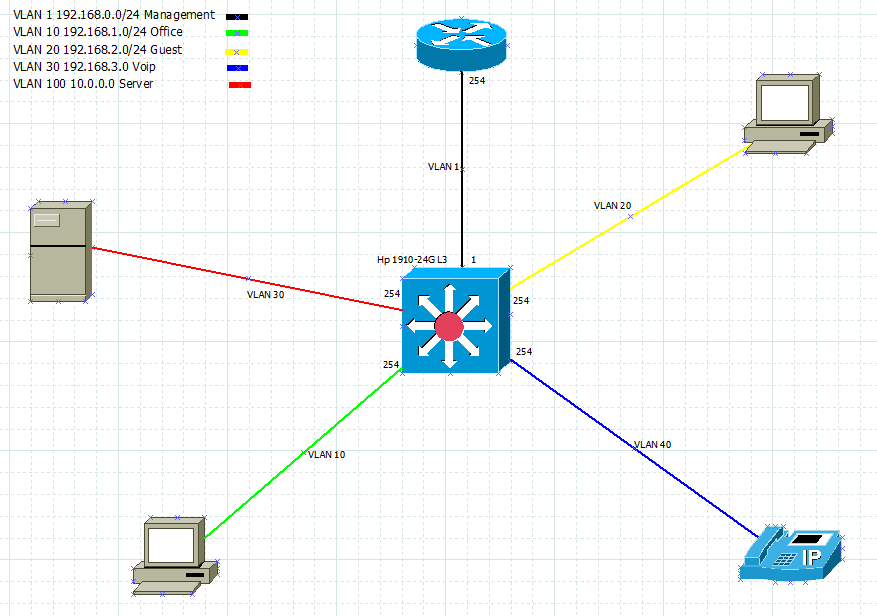
Before starting, here is the scheme of the network we are going to build. We are using a HP 1910-24G switch with inter-VLAN routing capabilities. A switch operating at the third layer of the ISO/OSI model:
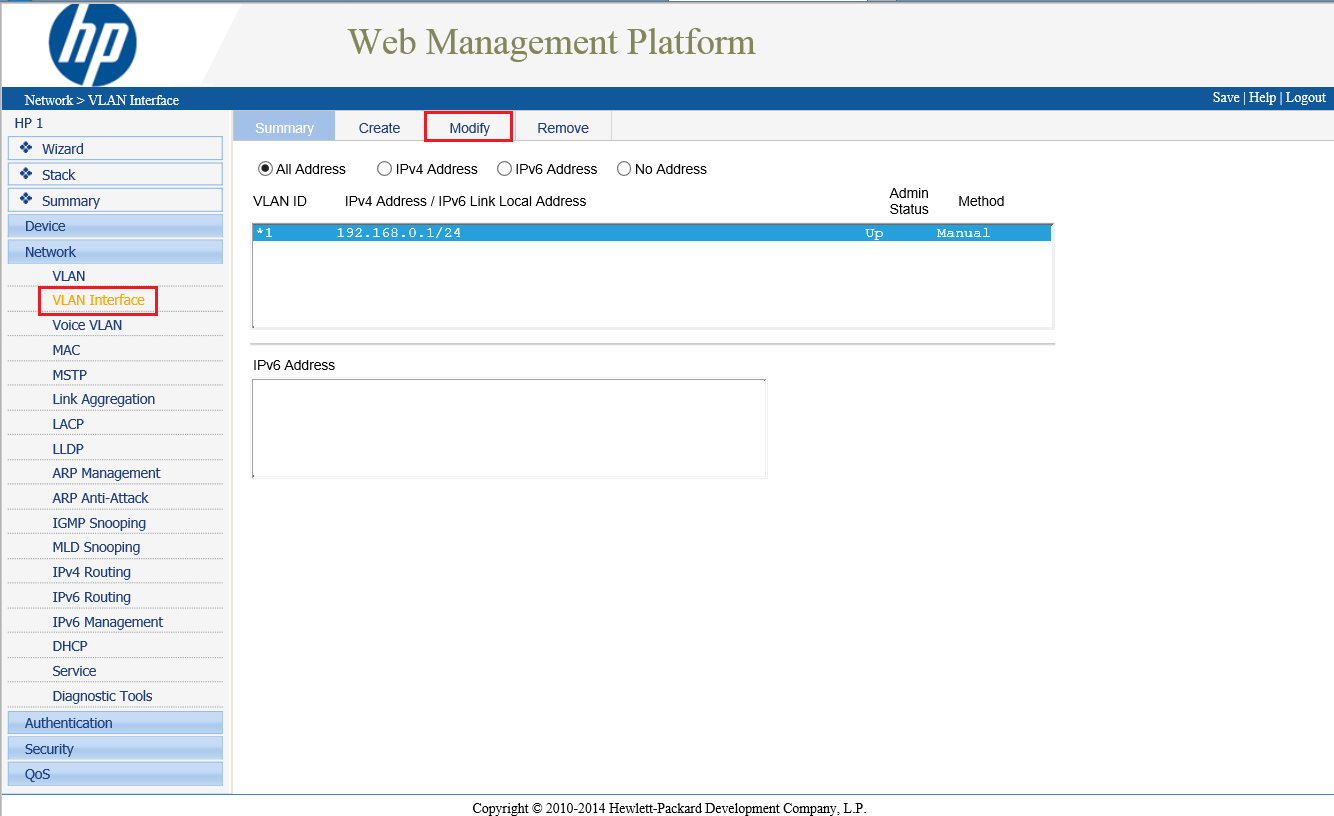
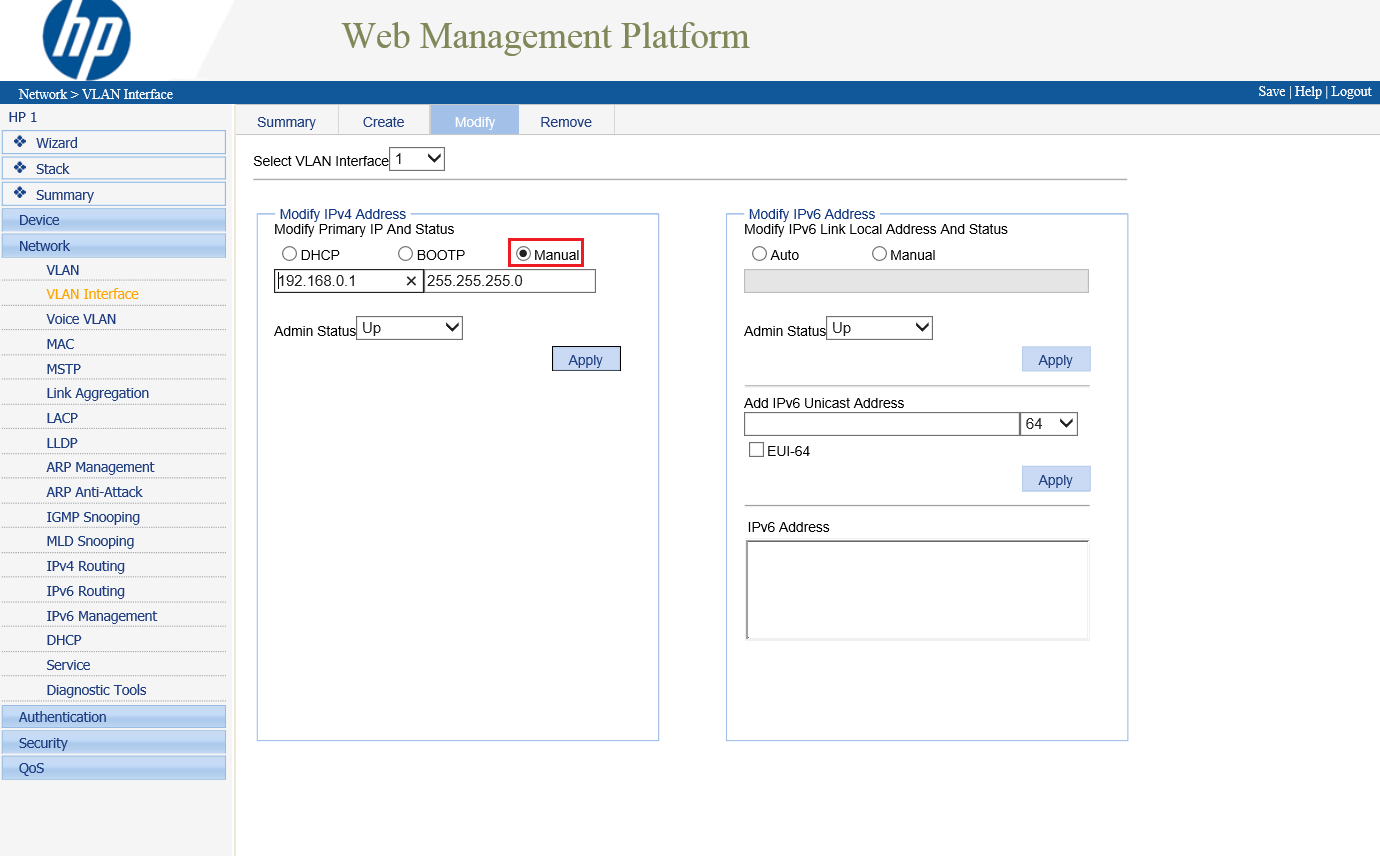
The first step is to access your switch and configure the management address (of the switch itself):
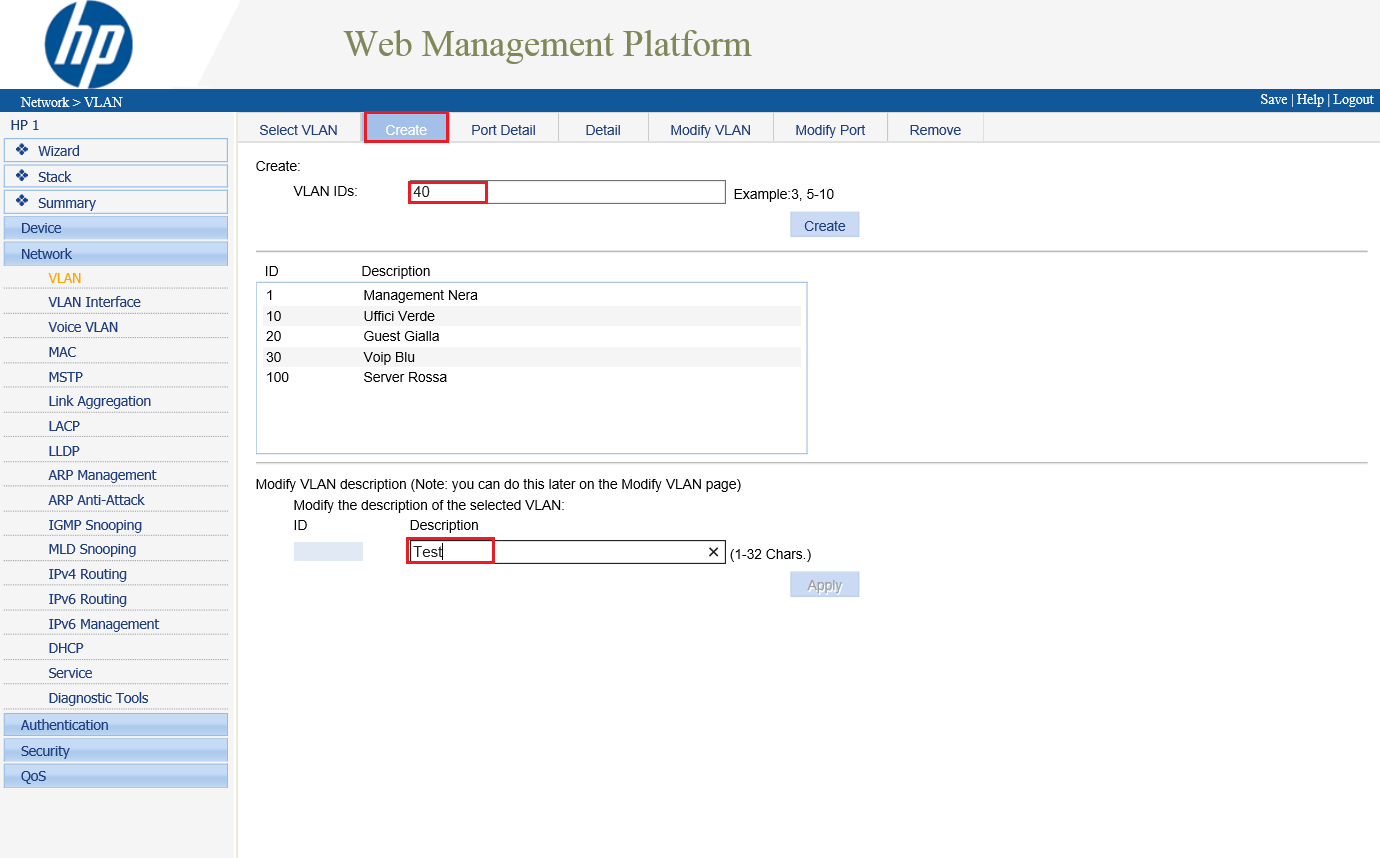
Now let’s create the VLANs defined in our project. Every VLAN has an ID and a description:
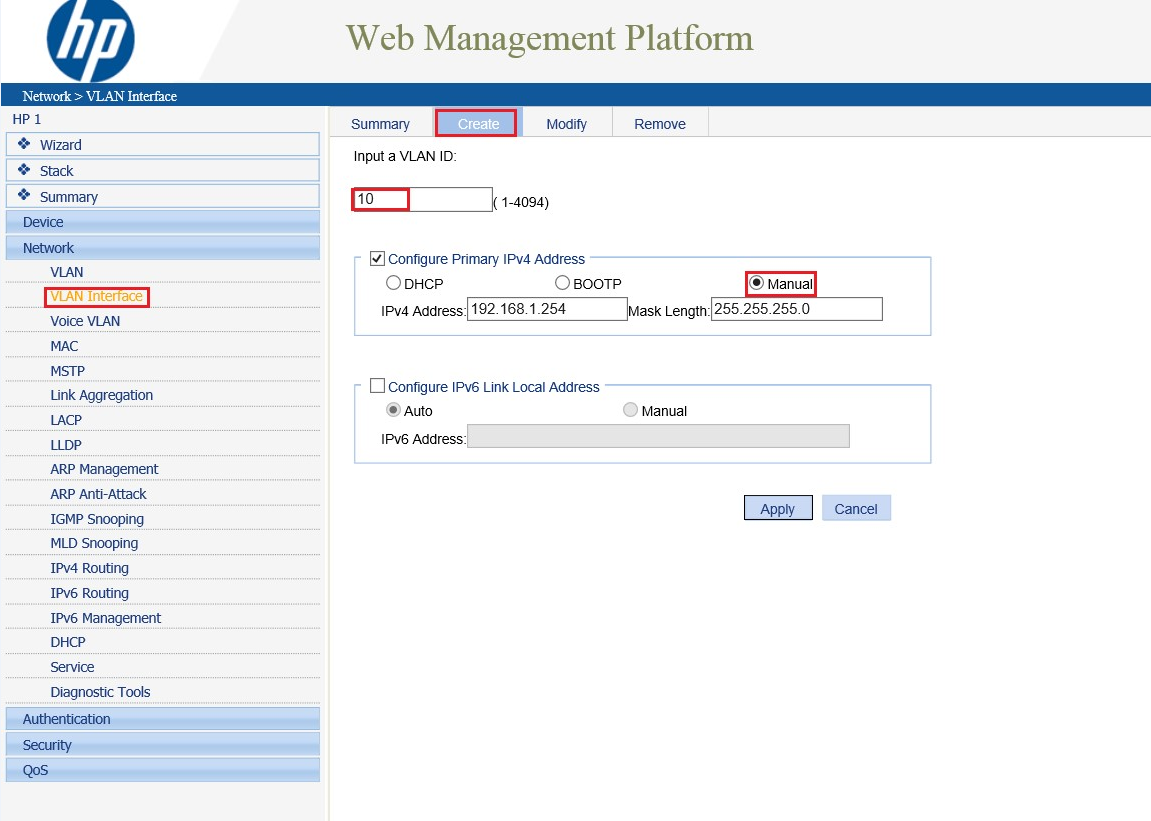
In order to allow all the connected devices to interact and access the Internet, you need to configure the L3 routing capabilities of the switch. Define an IP address for each VLAN interface, this address will be specified as Default Gateway in the network configuration of each device (PC, tablet, smartphone, printer, etc..) connected to the related VLAN:
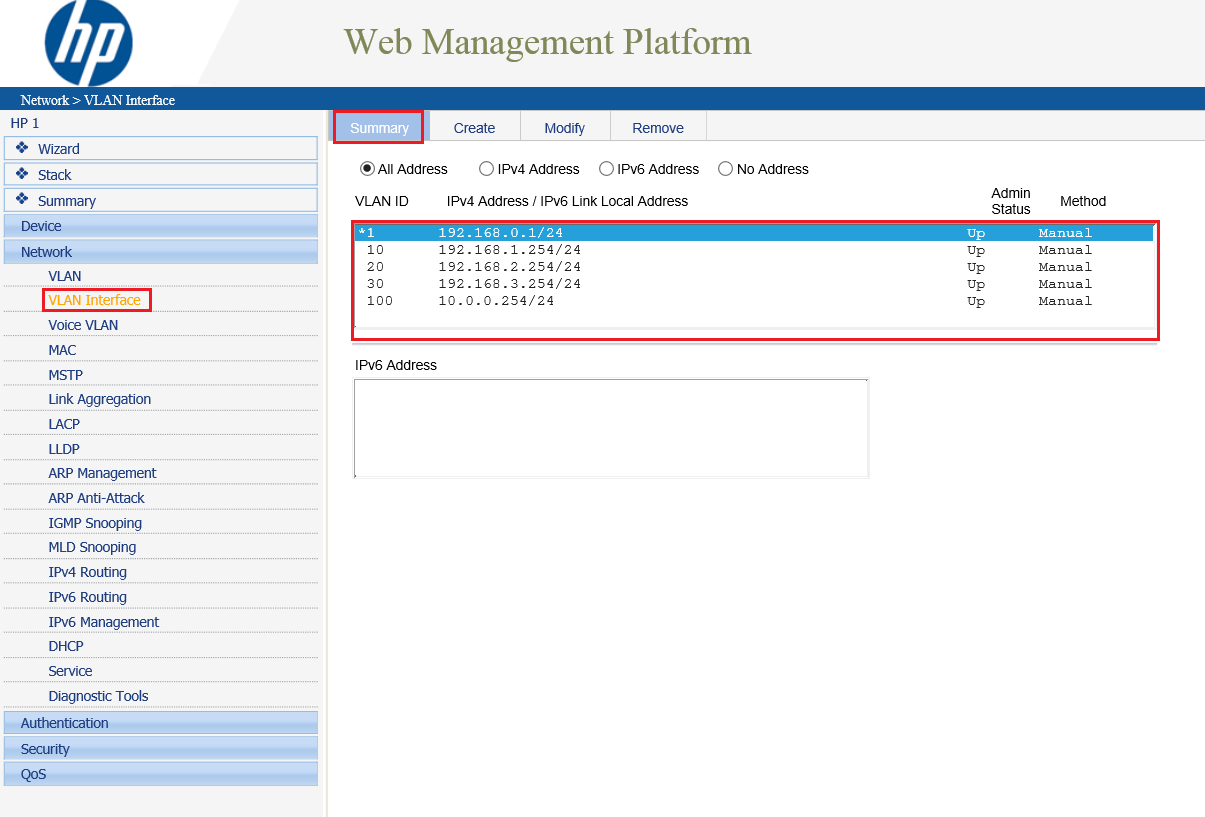
You can check the addresses of the VLAN interfaces from the Summary tab:
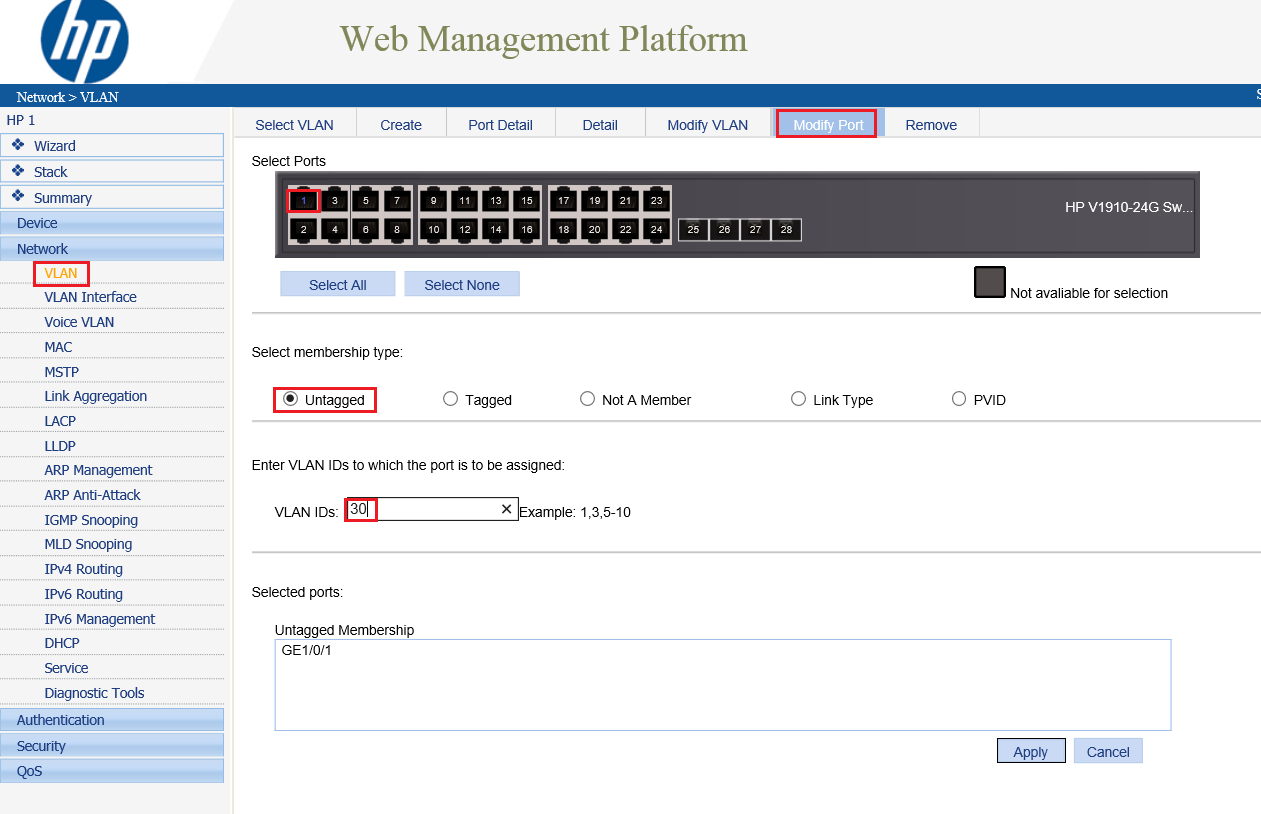
It’s time to assign a physical port to each VLAN. In the screenshot we are assigning port 1 to the VoIP VLAN (ID 30). In order to assign the physical port (untagged) it must be configured in access mode:
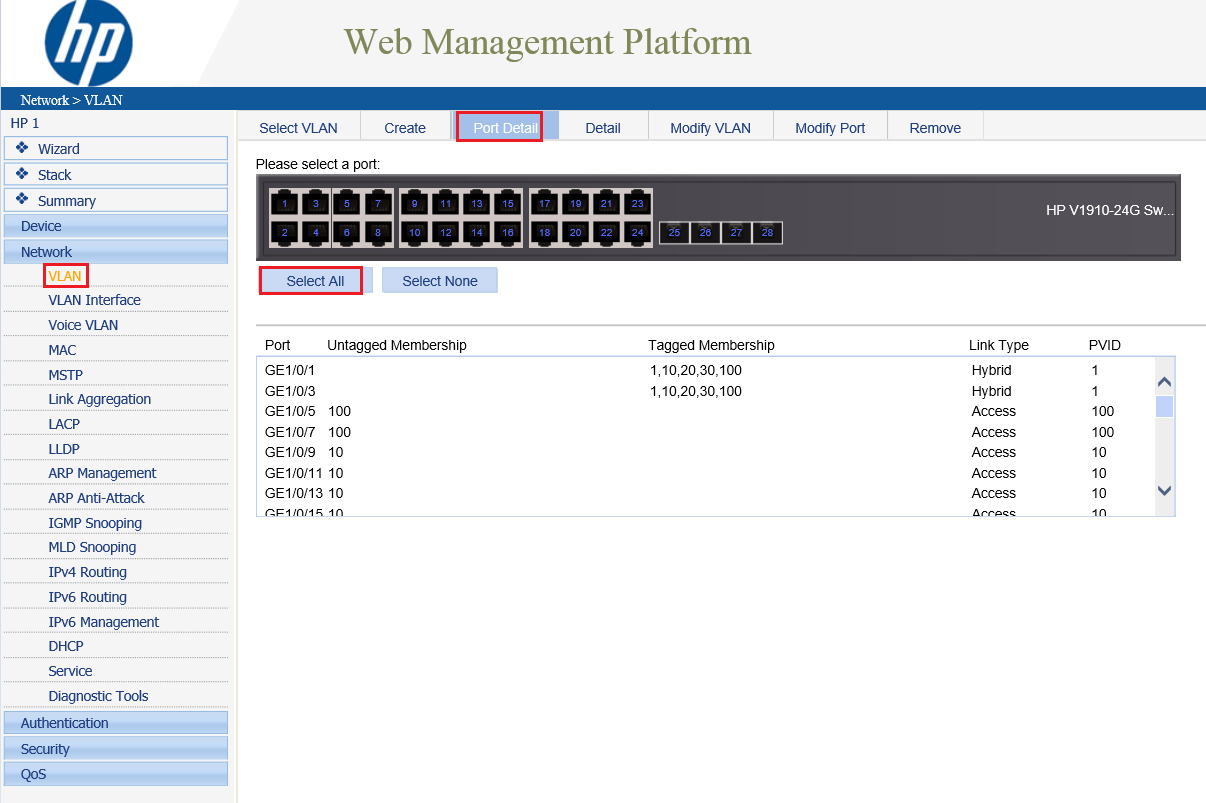
You can also check the configuration of each port from the Port Detail tab:
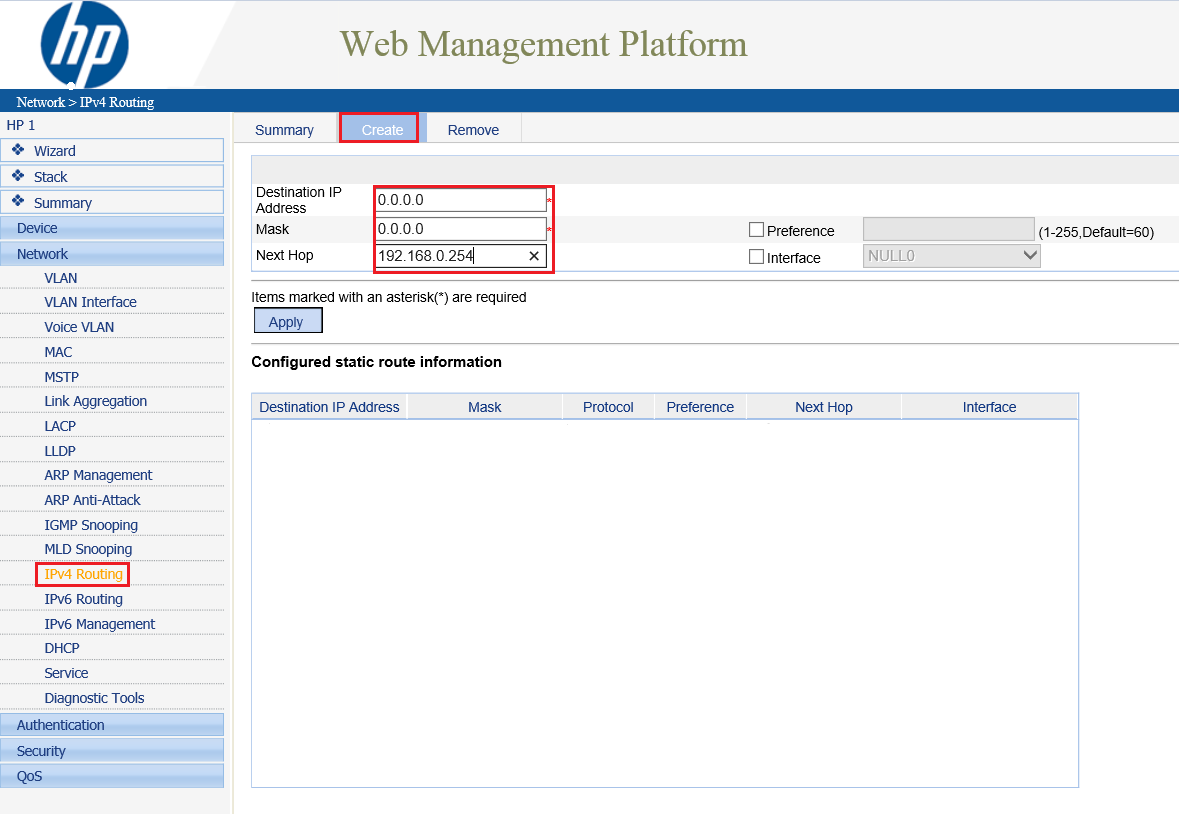
To let all the subnets related to each VLAN access the Internet you need to configure the L3 switch. Define a last resort gateway (or default route) specifying as Next Hop the router managing the Internet traffic:
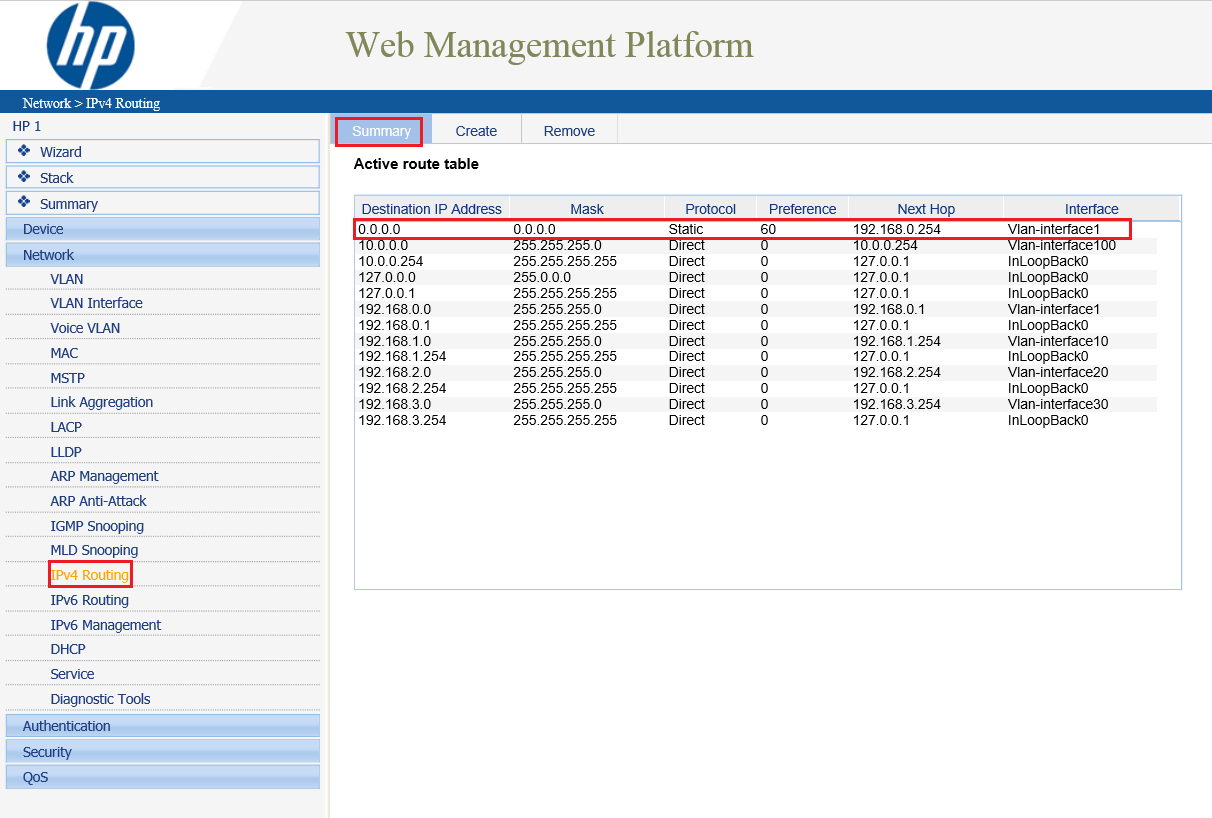
From the summary tab you can check the routing configuration:
It’s also necessary to configure the Internet router with static routes. These routes will direct traffic to the assigned VLANs. You need to specify the address of the switch as Next Hop.
Read related articles
A Guide to PowerShell – part 3
Welcome to part 3 of 3 of The Solving A guide to PowerShell. Check also Part 1 and Part 2.
A Guide to PowerShell – part 2
Welcome to part 2 of 3 of The Solving A guide to PowerShell. Click here for Part 1 and Part
A Guide to PowerShell – part 1
Welcome to part 1 of 3 of The Solving A guide to PowerShell. Click here for Part 2 and Part

