Securing ESXi and vCenter servers is an essential part of any virtual infrastructure administrator’s responsibilities.
VMware makes available a several features to protect the servers, including the ability to set granular permissions, a directory authentication mechanism, a firewall, a virtual switch layer 2 security and more.
Knowing the capabilities of these features and how to use them is essential to administer ESXi and vCenter enviroments.
Some years ago, only ESX came with a firewall, but with vSphere 5, VMware added a firewall to ESXi 5.
First of all, we need to add a security configuration to the ESXi host.
It includes a firewall between the management interface and the network, the management of the access control is provided through a VMkernel network adapter(vmknik).
The firewall is enabled by default, it blocks all traffic by default , except for traffic for the management services.
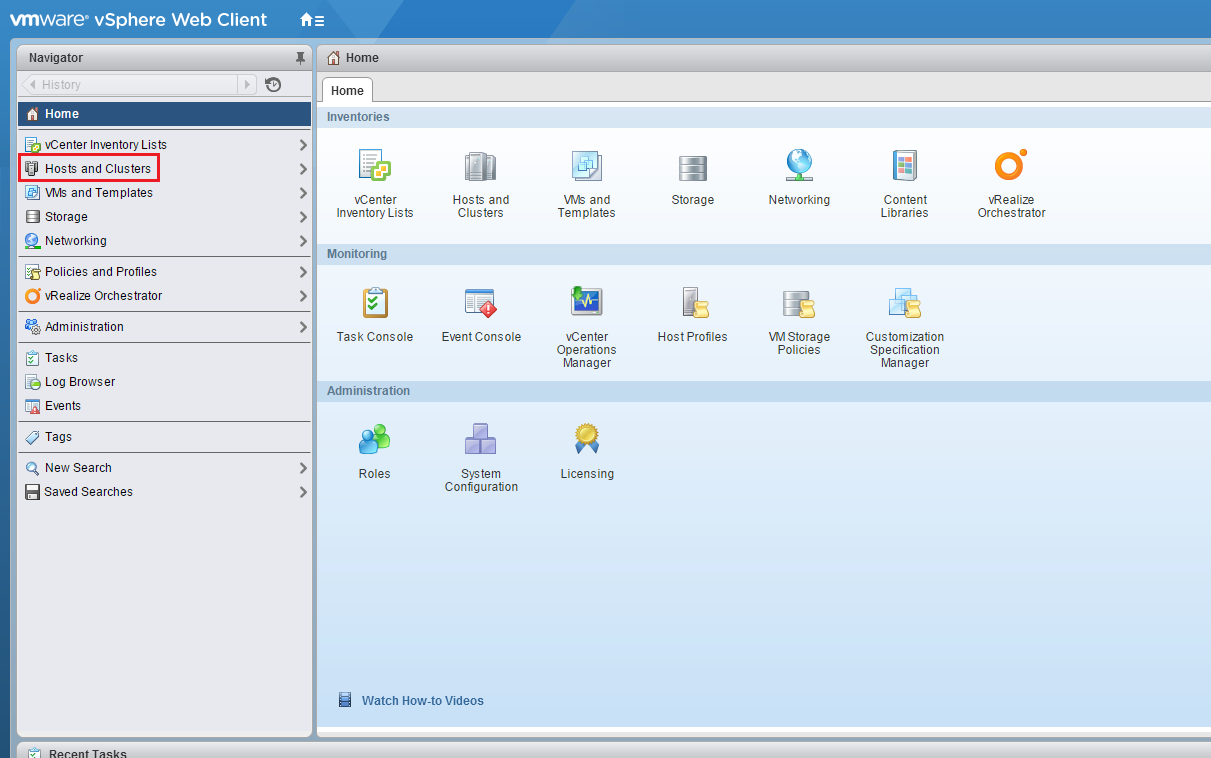
Let’s start to manage the firewall of your host starting by disabling NTP Client, open your vSphere Web Client and select Hosts and Clusters from the Home menu:
Choose the ESXi Host:
Press Manage, Settings, expand System menu and choose Security Profile:
Here we can see the list of management services in the Incoming and Outgoing tab, including the TCP and UDP ports:
Locate the NTP Client entry in the listing of Outgoing Connection:
Press Edit:
Scroll down and select the NTP Client entry in the Name column and deselect it:
Review the list of Outgoing Connections, and verify that the NTP Client is no loger listed there:
Go back to Edit Security Profile pressing Edit, scroll down and choose NTP Client, verify that the Client status shows Stopped:
At this point, you have seen the steps for disabling the NTP Client. The same process can be used for other services in the ESXi firewall as well.
Now enable again the NTP Client and deselect Allow connections from any IP address, specify the IP or subnet used by the vCenter Server management intefarface (e.g. with IP address 192.168.2.105 and subnet 255.255.255.0 specify 192.168.2.0/24).
The adding of multiple networks are supported:
You can review the security policies from the Outgoing connections list:
Read related articles
Install VMware ESXi on a Hyper-V
It is possible to use nested virtualization to run VMware ESXi as a Virtual Machine in Hyper-V. To some, this
How to install and configure VMware PowerCLI version 10
VMware PowerCLI is a collection of Windows Powershell modules which are used to manage and maintain a VMware virtual environment.
How to set up a Hyper-V failover cluster
Hyper-V can enable high-availability using Windows Server Failover Cluster Manager. This allows you to create a virtual infrastructure which is

 Italiano
 Español


