
 Italiano
 Español
Microsoft Hyper-V lacks the capability to create and manage templates and this can be troublesome for IT specialists requiring to deploy a large number of identical virtual machines. A time-consuming task that could be much more efficient and simple.
To save your time, we suggest the following methodology that is more similar to a work-around. You will be able to deploy several virtual machines without much effort but it will still be difficult to deploy hundreds (or worst thousands) of them.
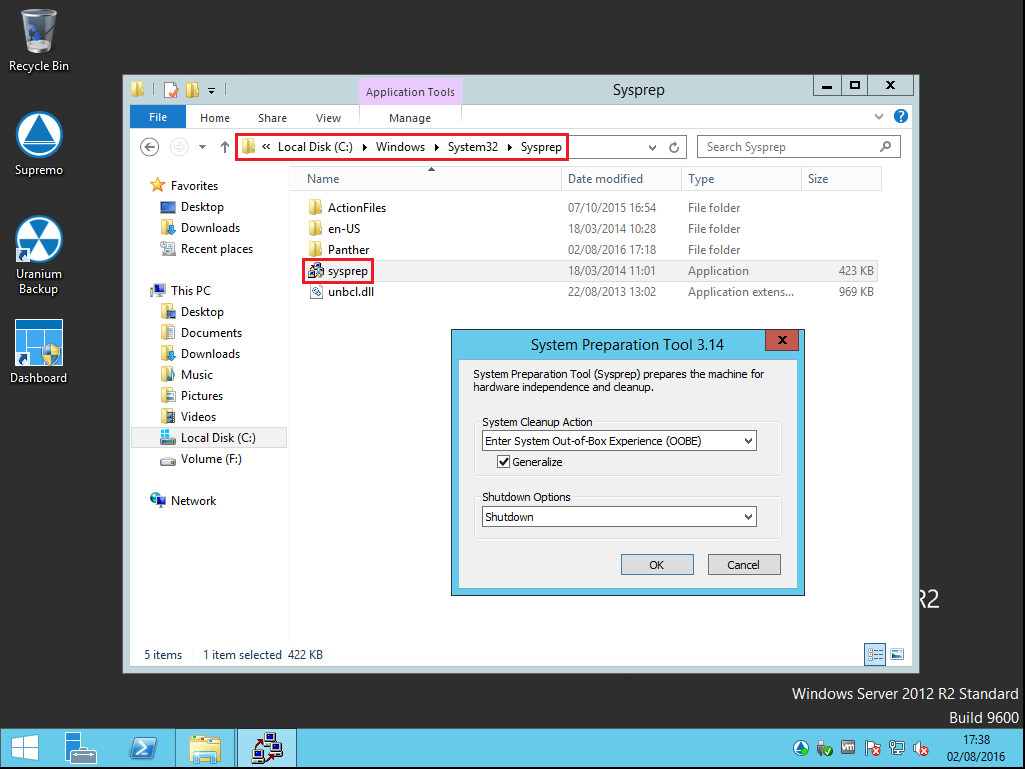
The first step is to prepare a virtual machine that will become the template. In our example, we used a Windows Server 2012 R2 VM. Install the operating system, preparare the application and then navigate the path C:\Windows\System32\Sysprep. Inside the folder you will find the executable Sysprep.exe, run it and configure as following. Sysprep is a Microsoft tool that allows to preprare a Windows installation to be cloned / duplicated:
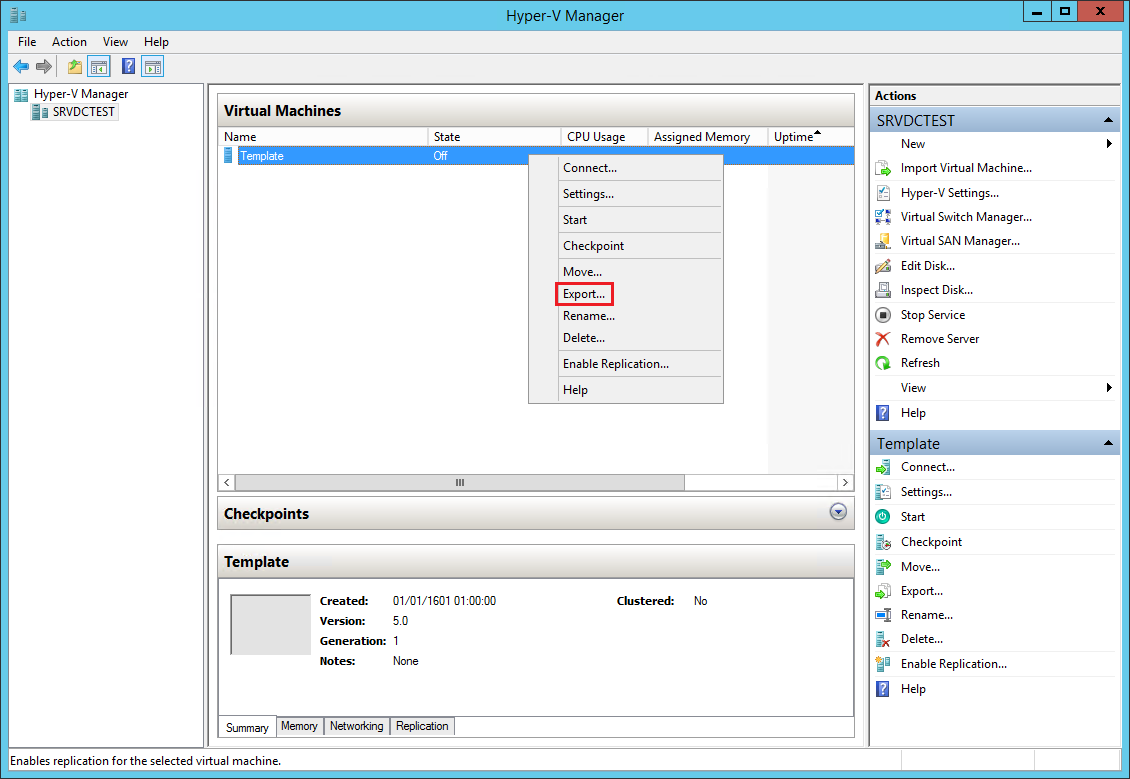
Now that the virtual machine is ready and switched off, let’s go to the hypervisor. Select the VM and export it:
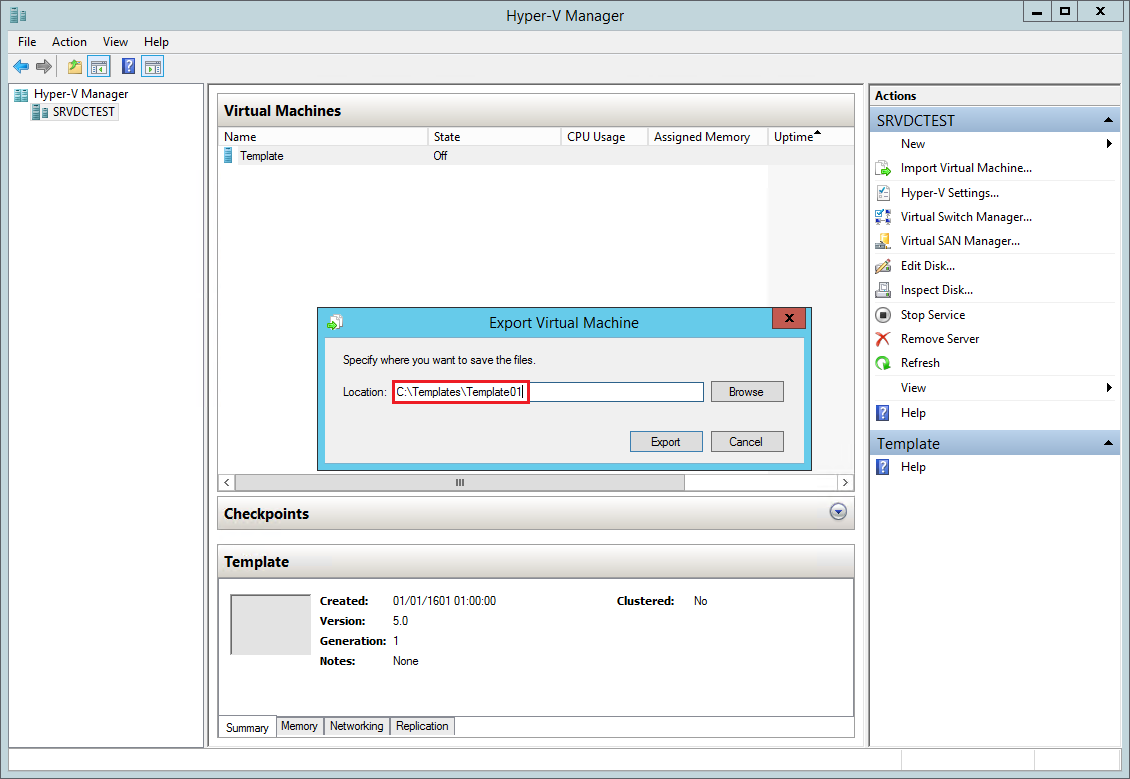
Create a folder where to store the template:
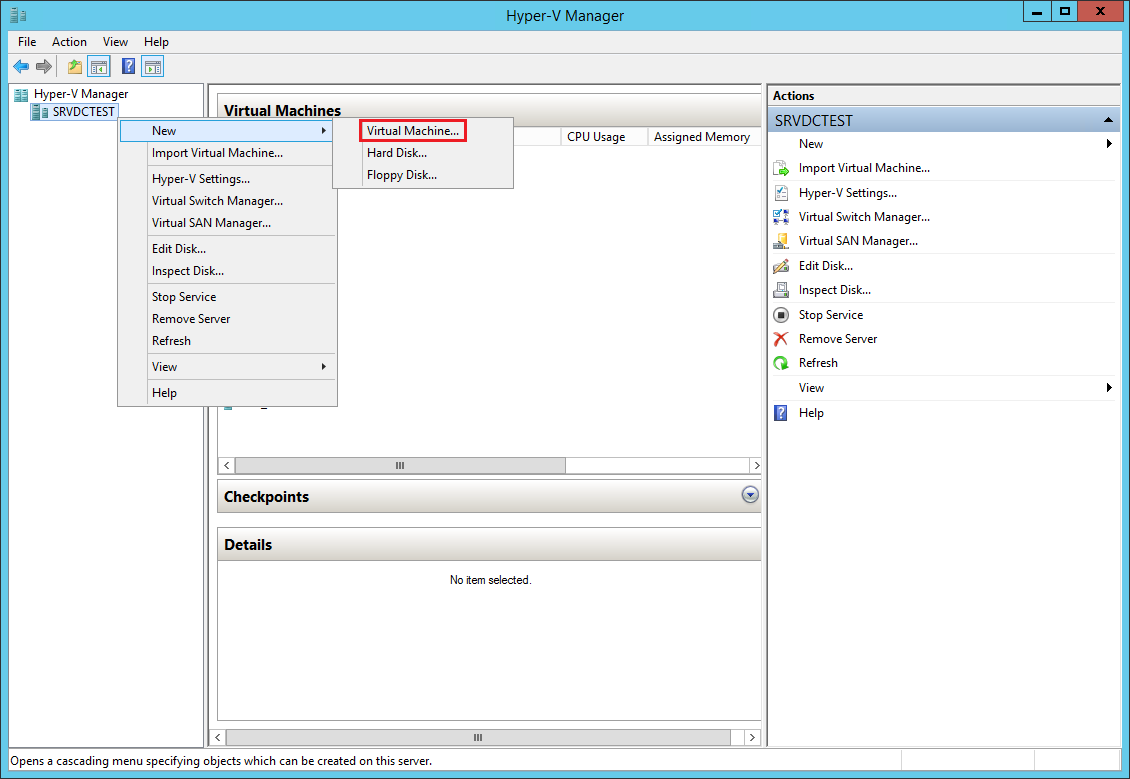
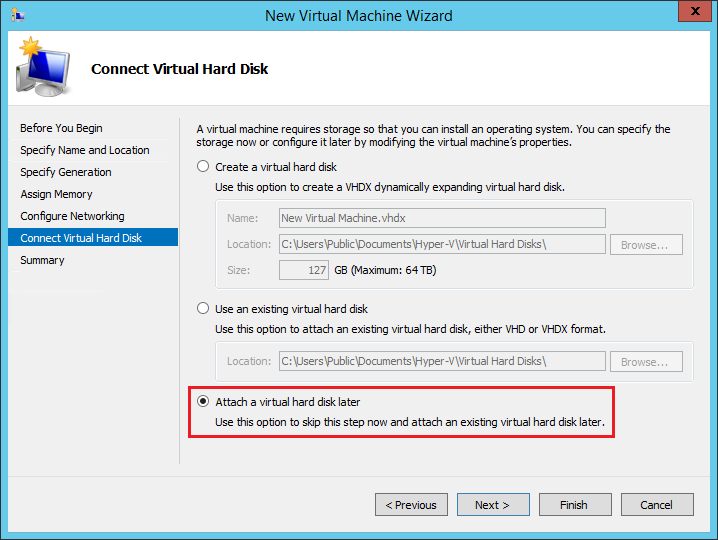
We are ready for the second part of the tutorial, the deploy phase. Create a new virtual machine:
At the Connect Virtual Hard Disk tab, select Attach a virtual hard disk later:
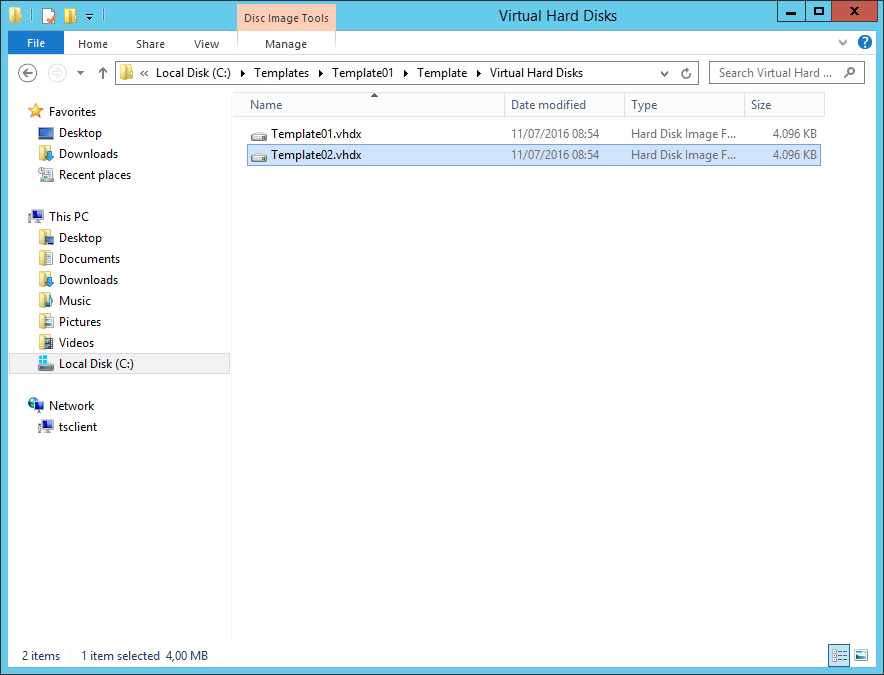
Let’s create a copy of the stored template. In our example, we left the file in the same folder of the template but we suggest to copy it inside the folder of the newly created VM:
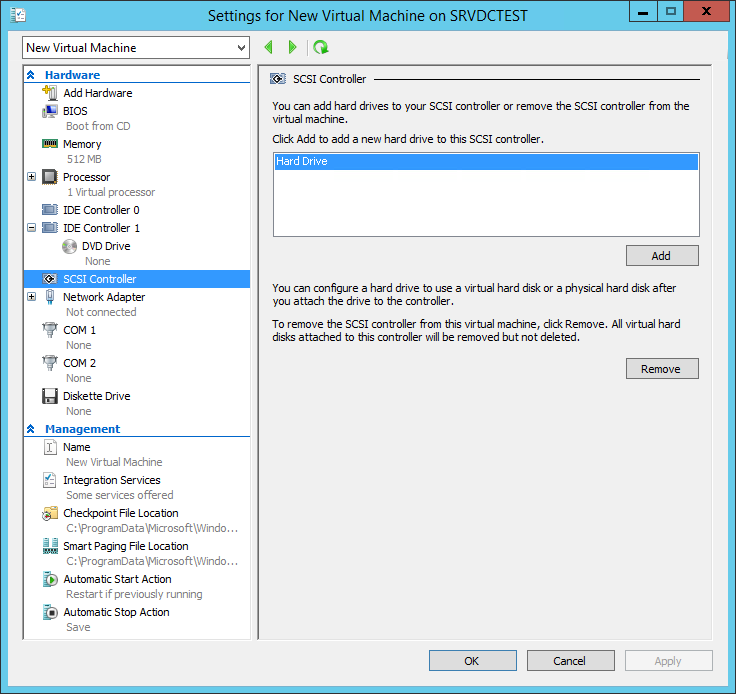
Edit the Settings of the newly created VM and add a HD:
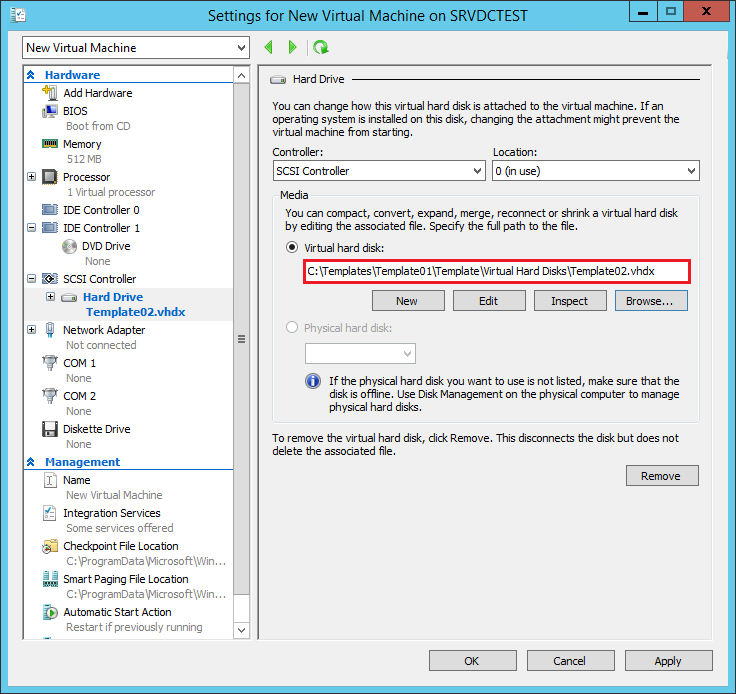
Select the path of the copied virtual disk and Apply:
You’re ready to start the new VM. Repeat the operation to deploy other virtual machines.
Read related articles
Install VMware ESXi on a Hyper-V
It is possible to use nested virtualization to run VMware ESXi as a Virtual Machine in Hyper-V. To some, this
How to install and configure VMware PowerCLI version 10
VMware PowerCLI is a collection of Windows Powershell modules which are used to manage and maintain a VMware virtual environment.
How to set up a Hyper-V failover cluster
Hyper-V can enable high-availability using Windows Server Failover Cluster Manager. This allows you to create a virtual infrastructure which is