VLANs are a great tool to manage business networks and VMware knows that very well. We’ll show you how you can configure ESX(i) to tag packets and how to create virtual switches for your VLANs.
Before reading the guide, it’s important to have VLANs configured in your network. More information on how to segment a LAN into VLANs here.
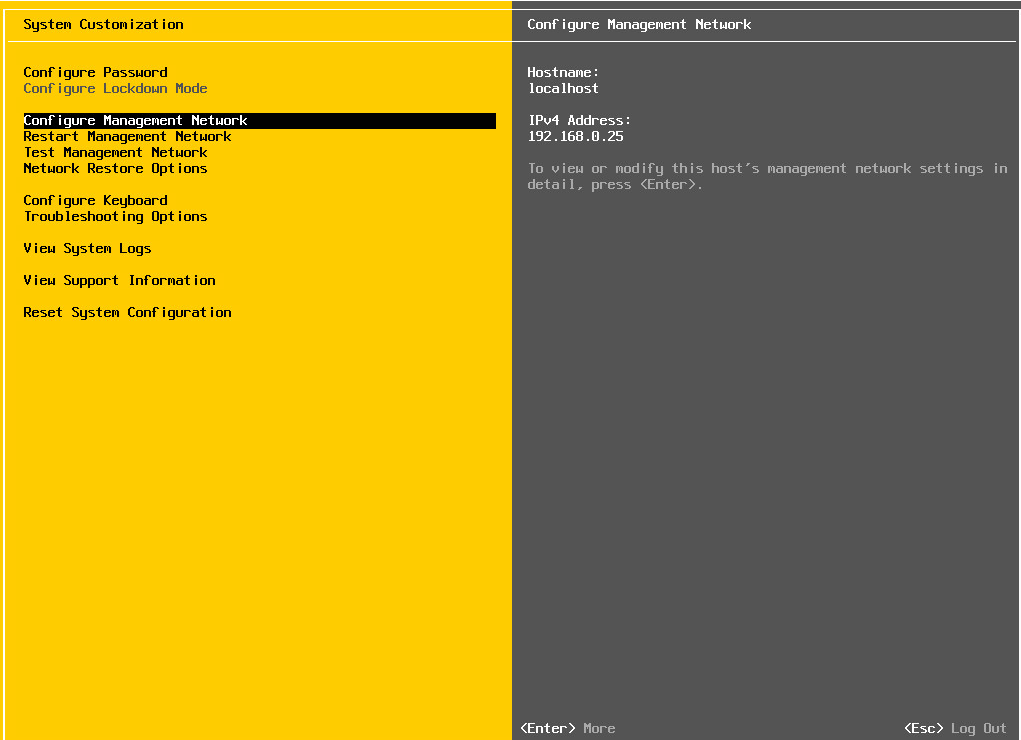
First of all, click F2 and access the ESX(i) console to enable VLAN architecture awareness. Select Configure Management Netowrk:
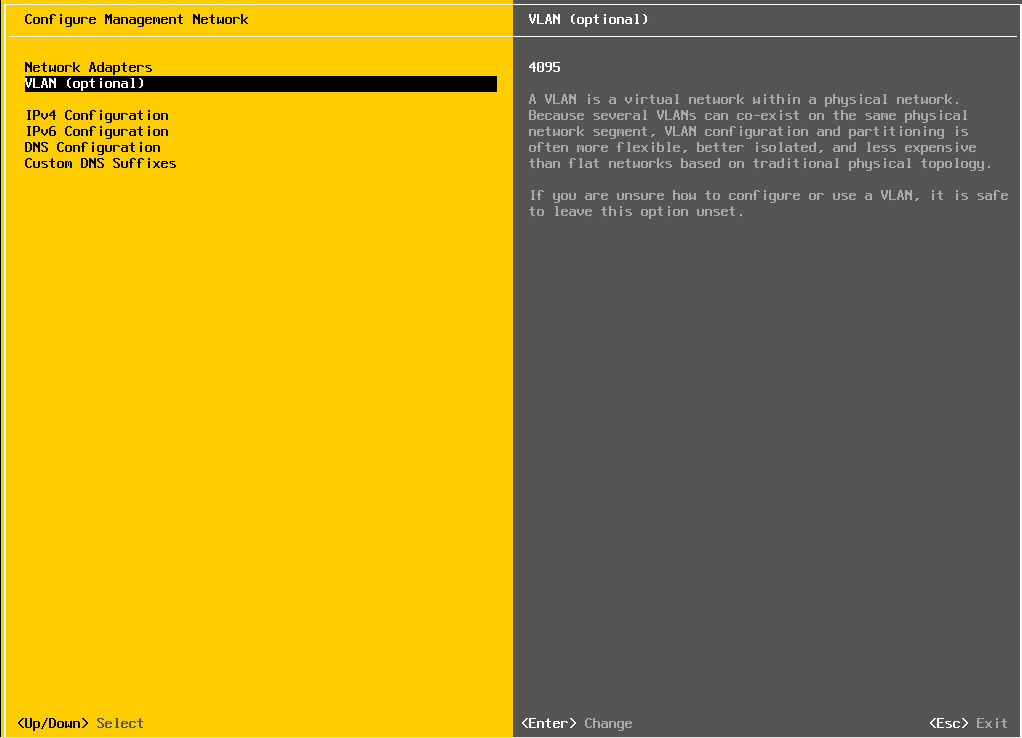
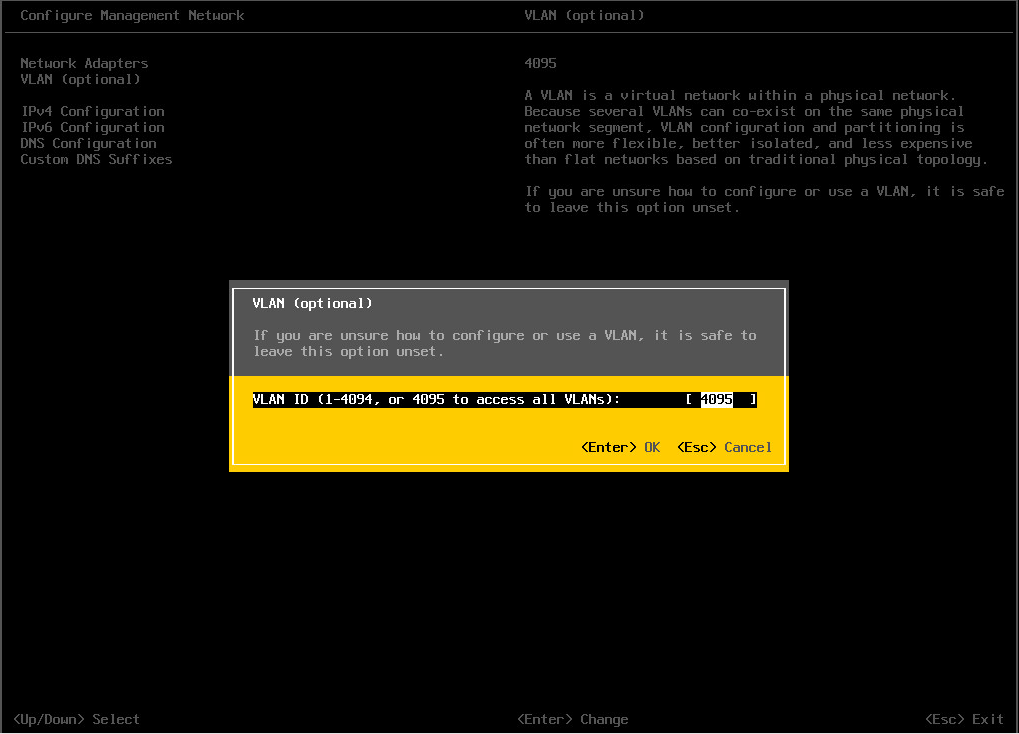
Enable VLAN tagging specifying 4095 as value:
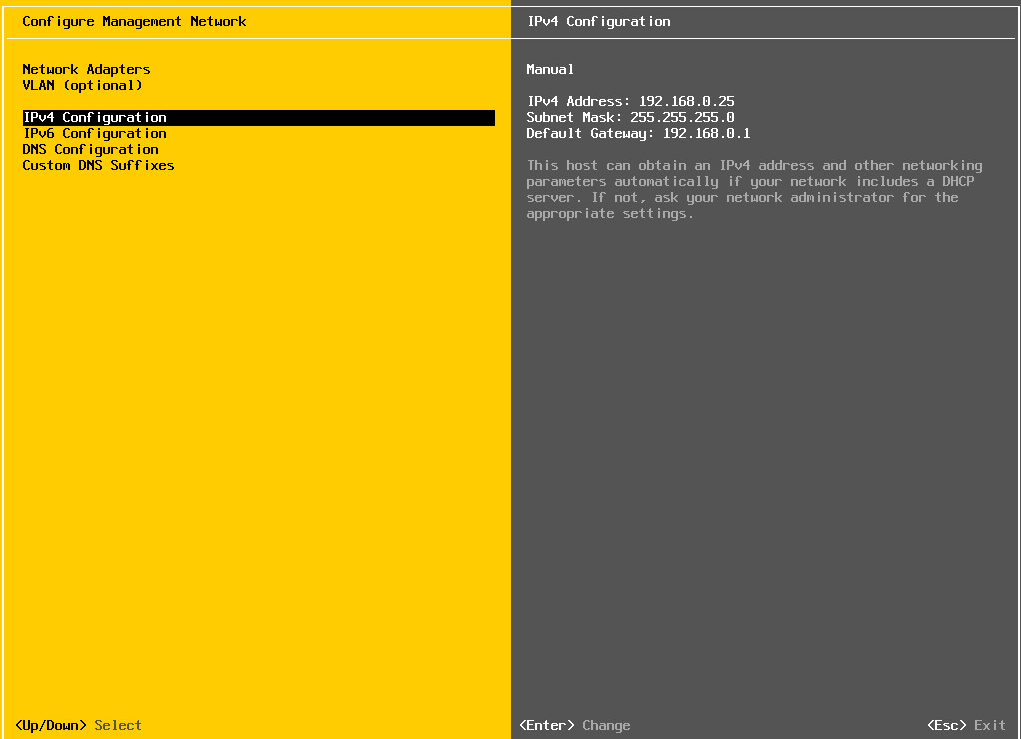
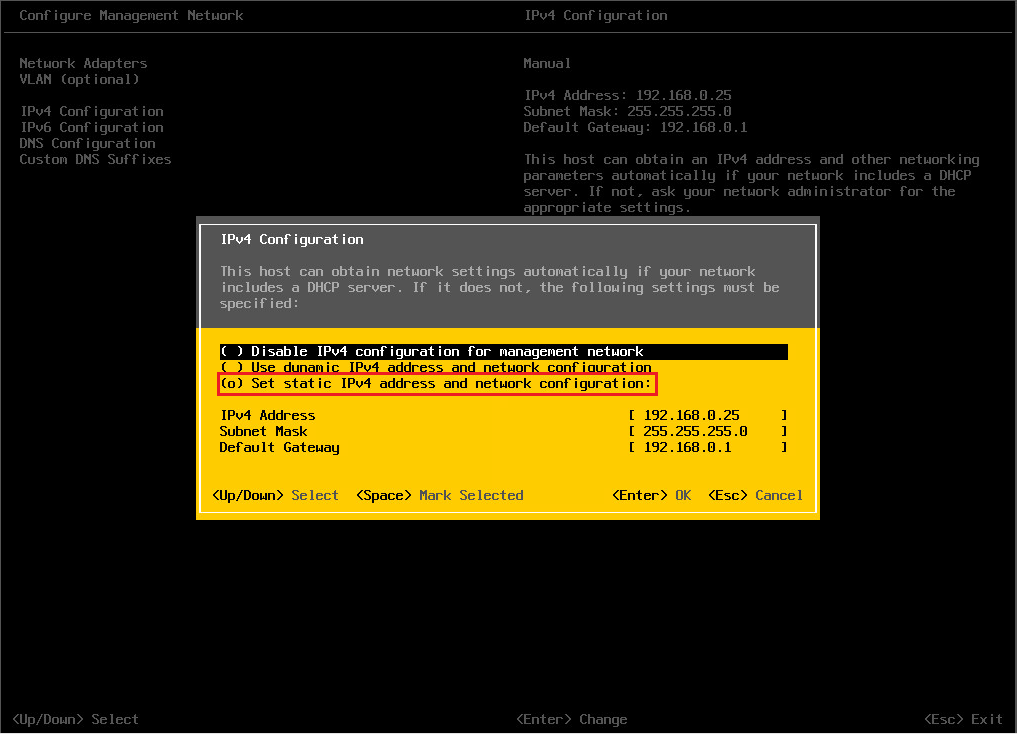
Specify an IP address for the management network adapter:
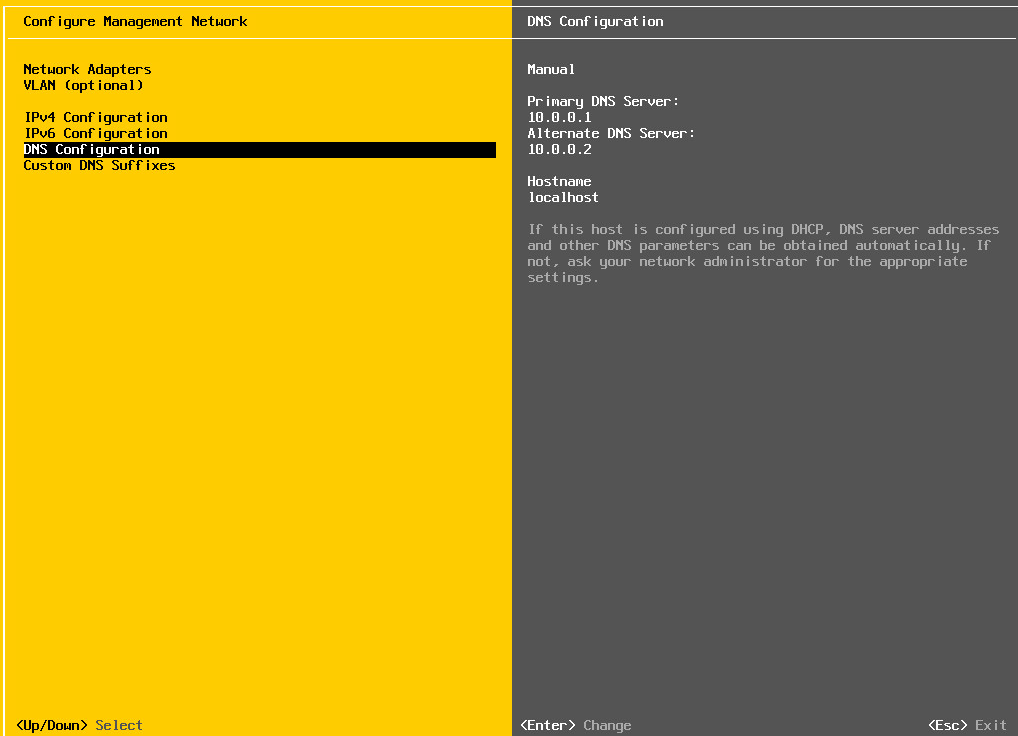
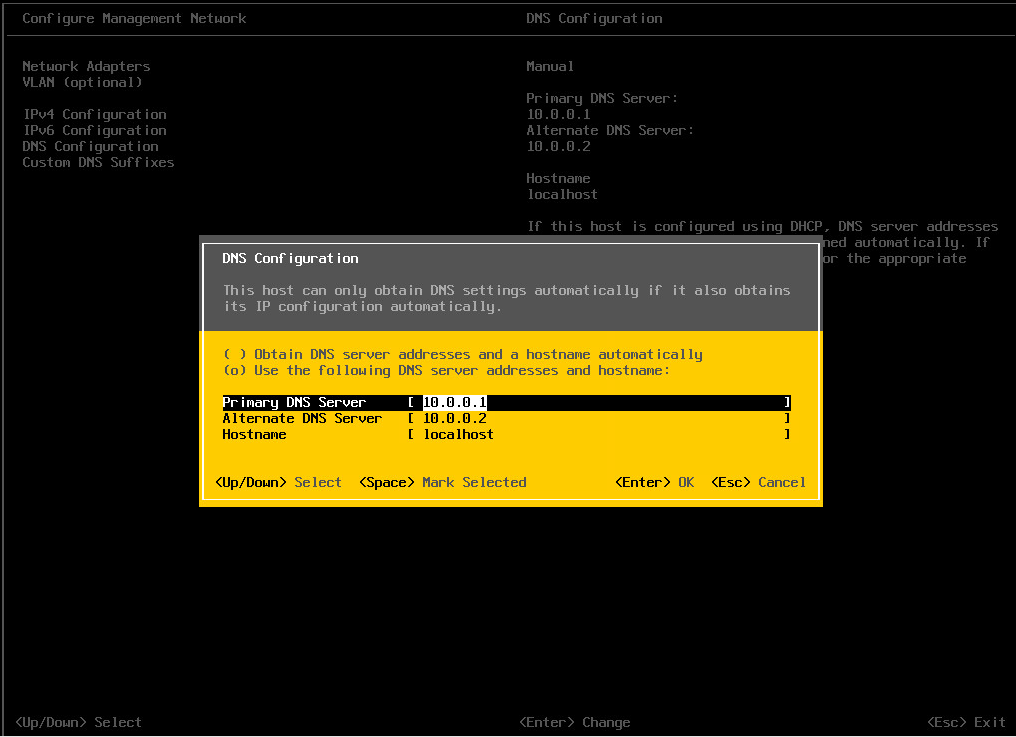
Define DNS servers:
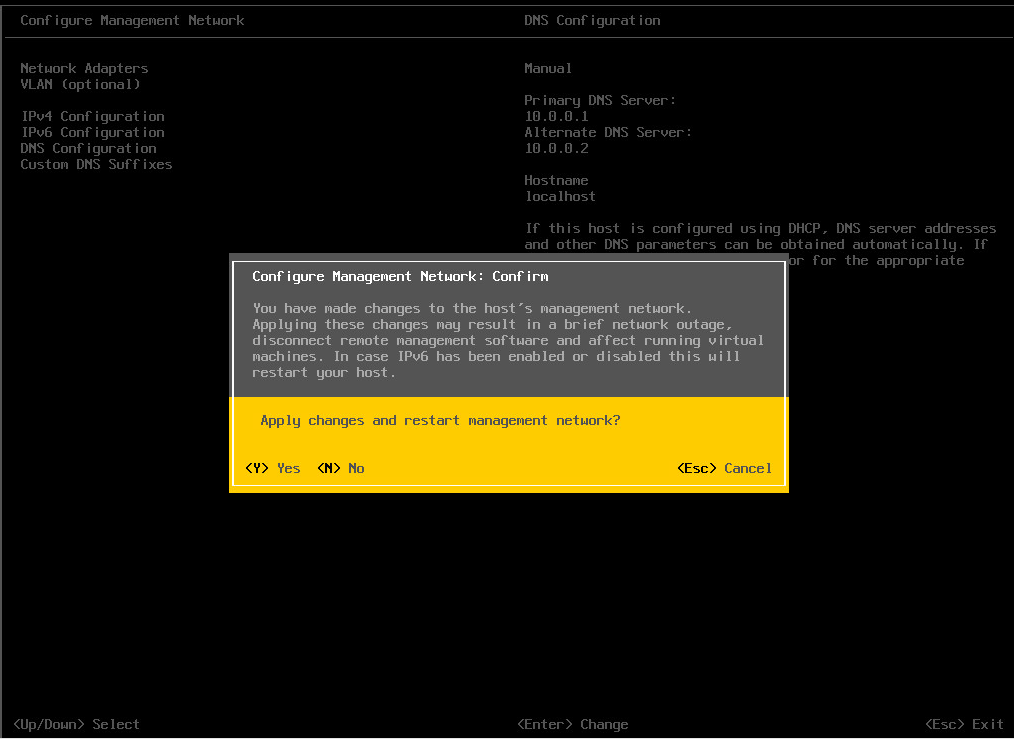
Press Esc and confirm:
Now your ESX(i) is VLAN architecture aware.
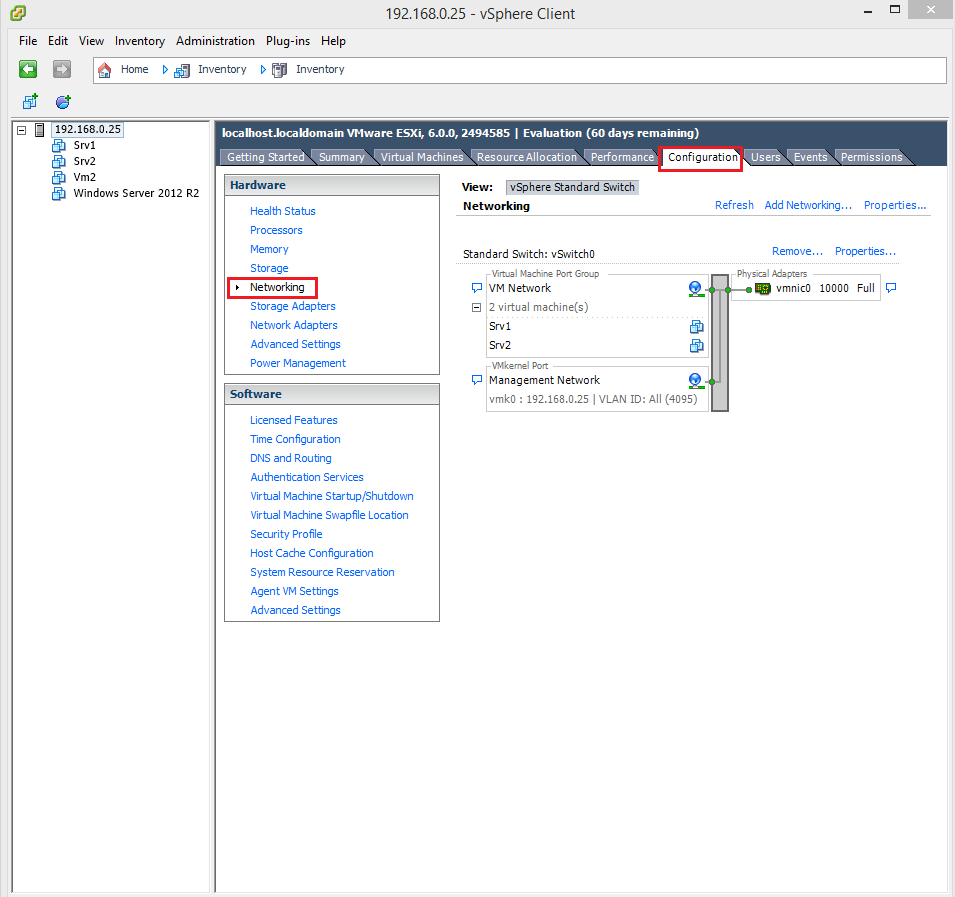
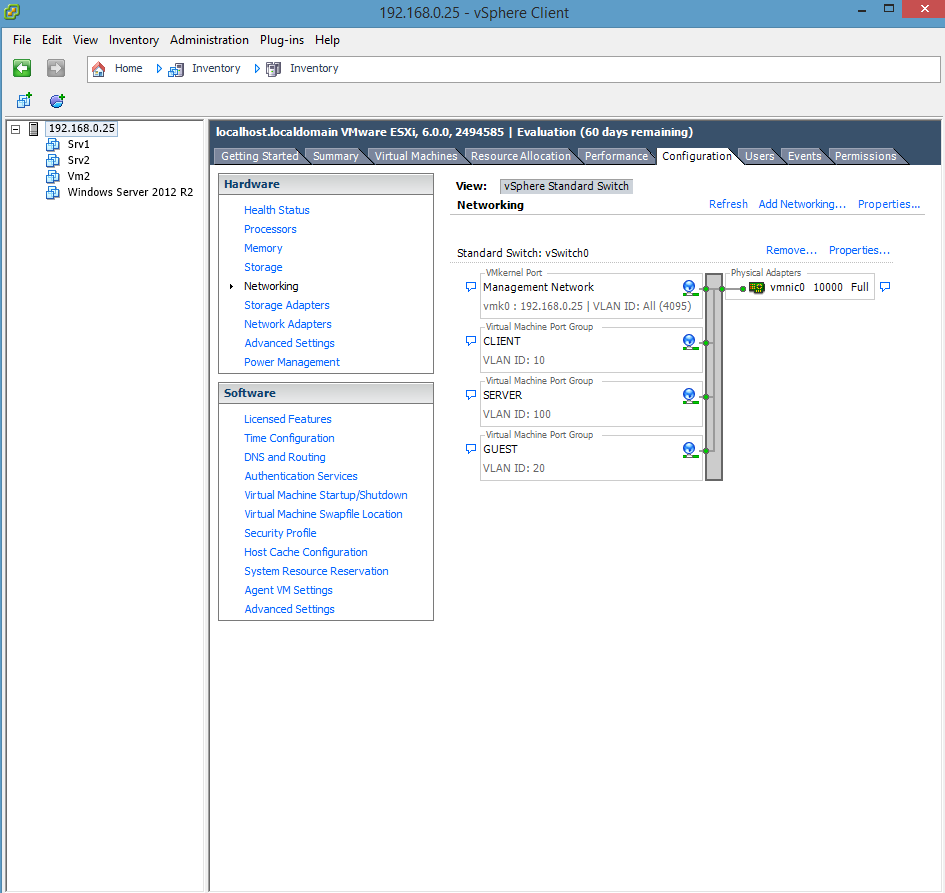
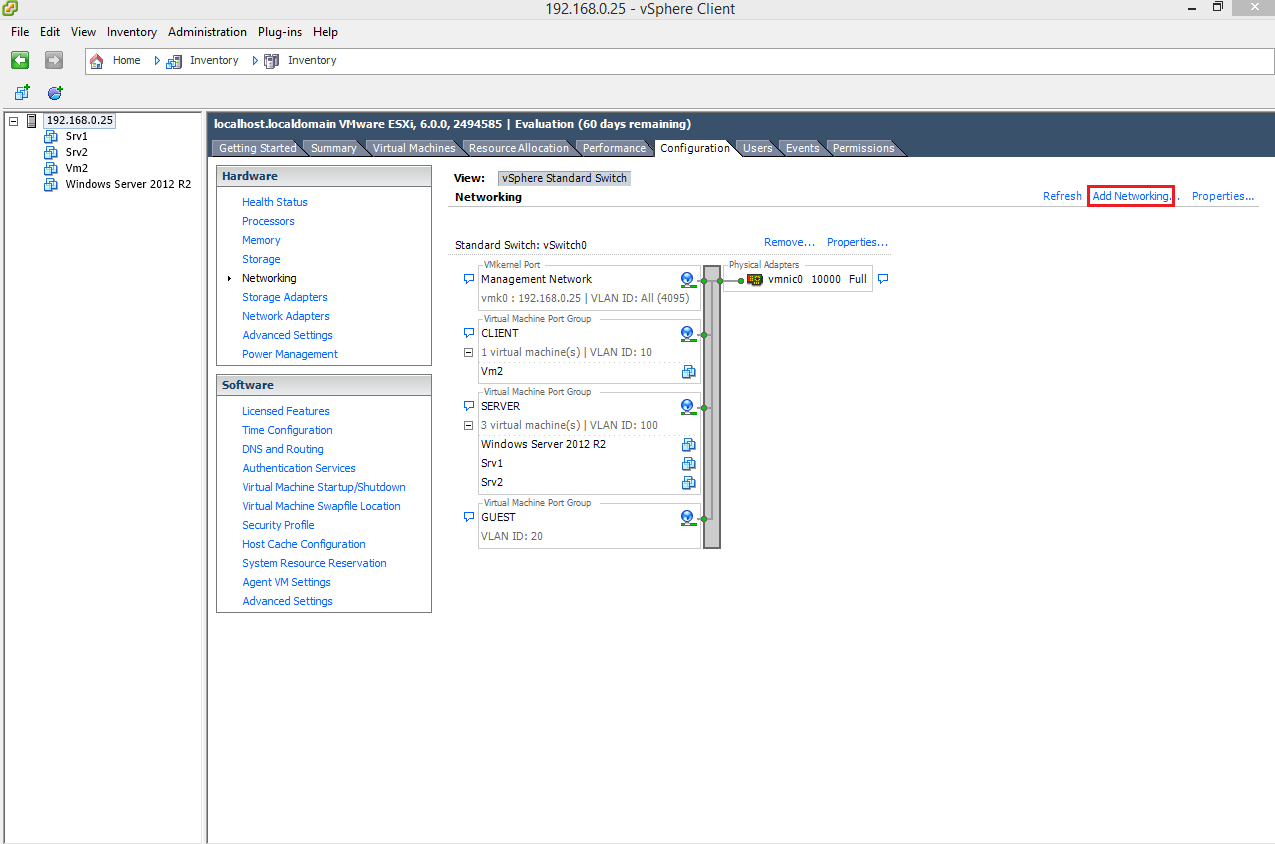
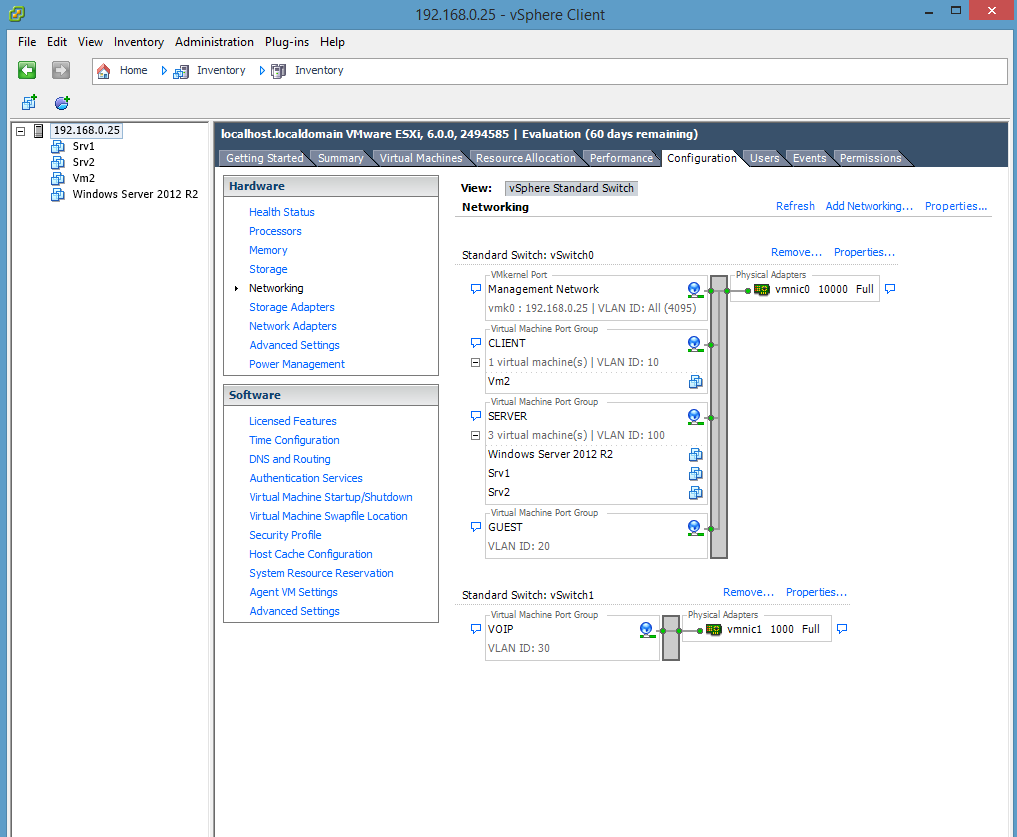
It’s time to launch the vSphere Client. Go to the Configuration tab and click Networking, you can see the management network with the 4095 tag:
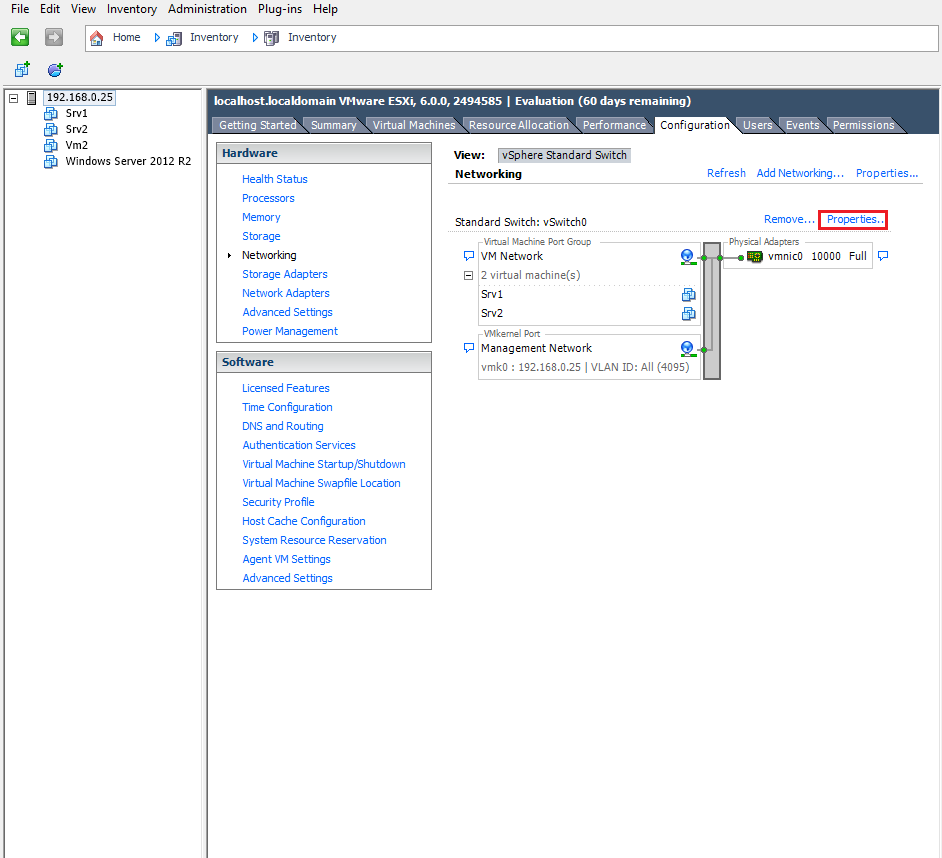
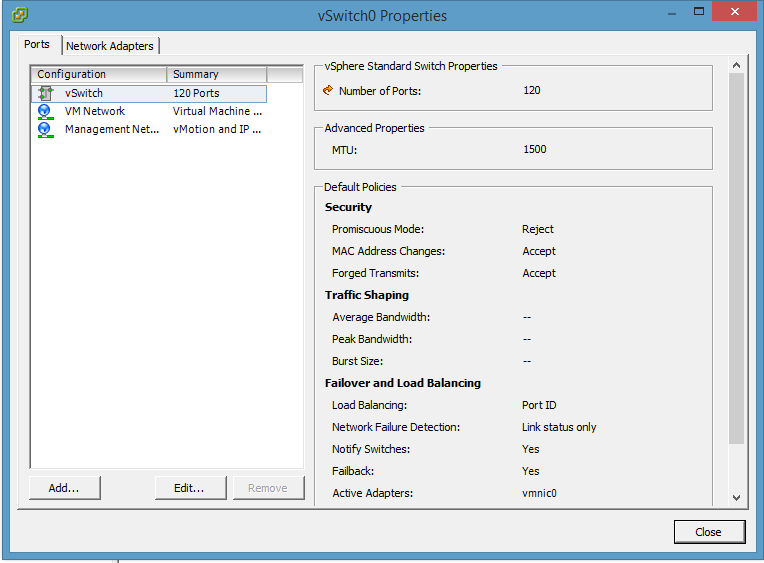
Click Properties:
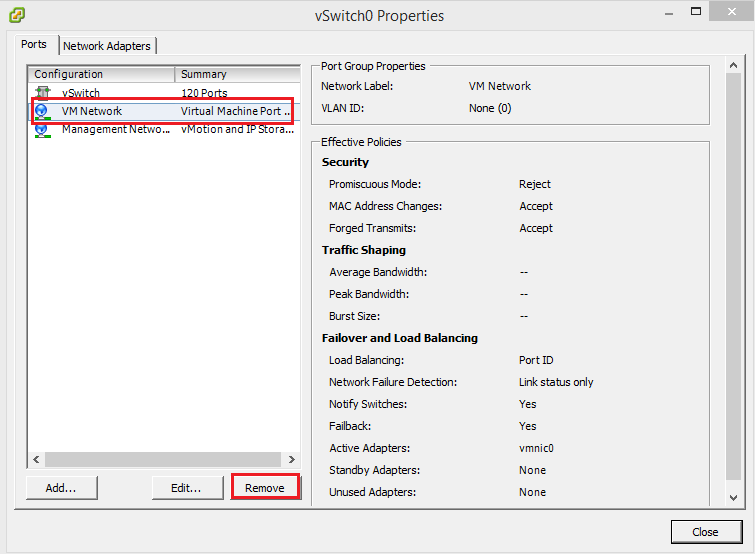
It’s time to remove the VM Network that will be replaced by the VLANs:
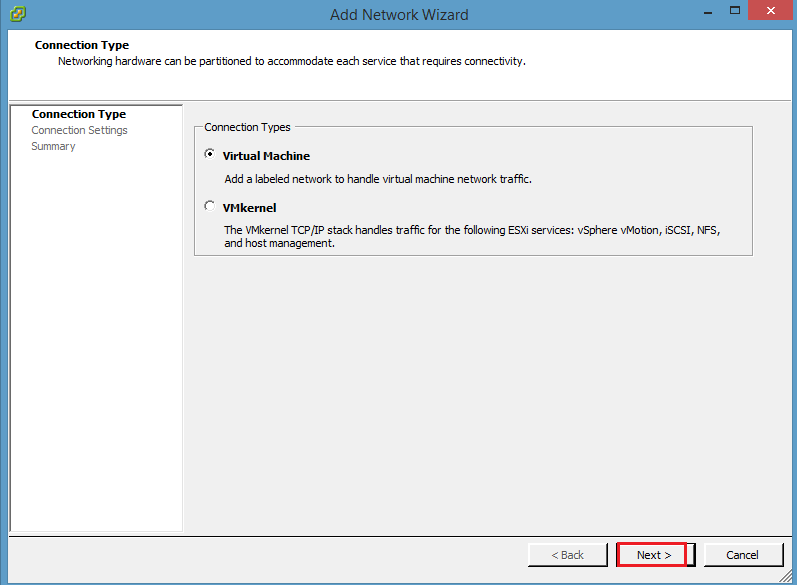
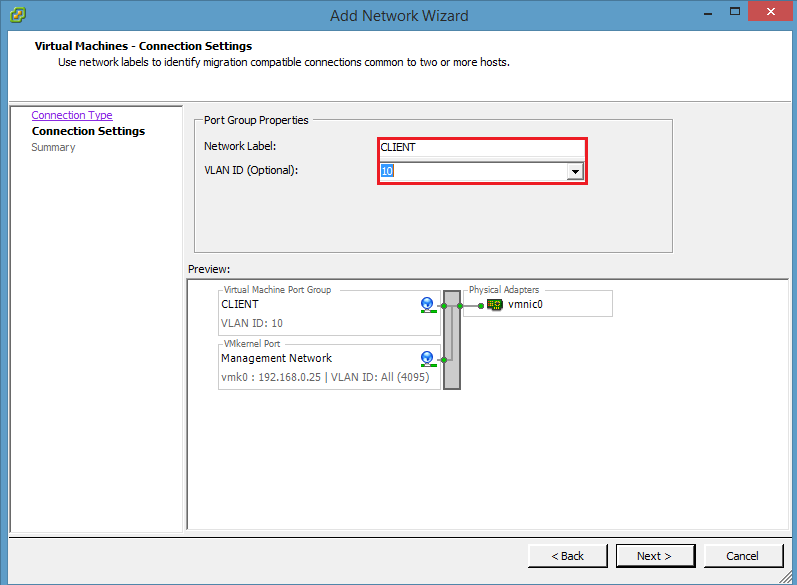
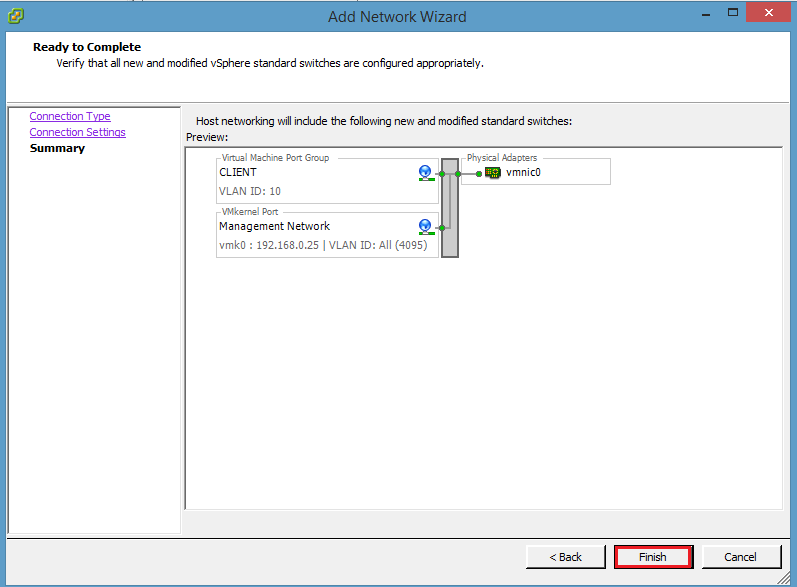
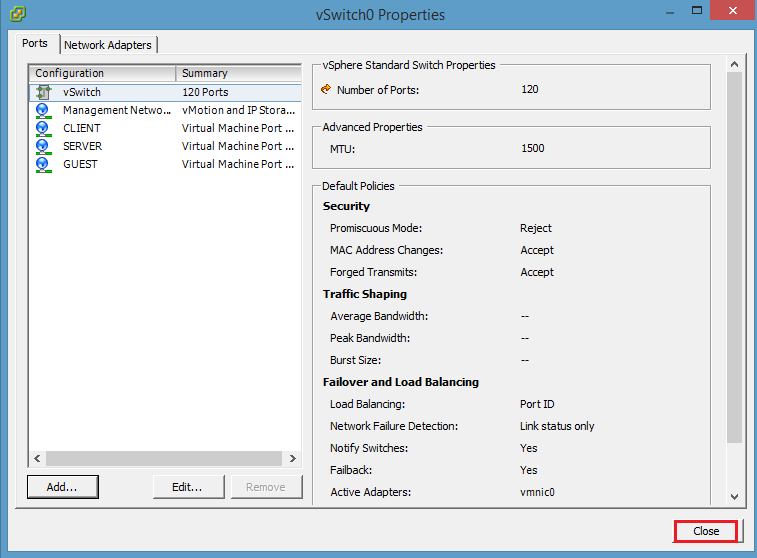
Create the VLANs with the IDs specified during the (physical) switch configuration clicking on Add:
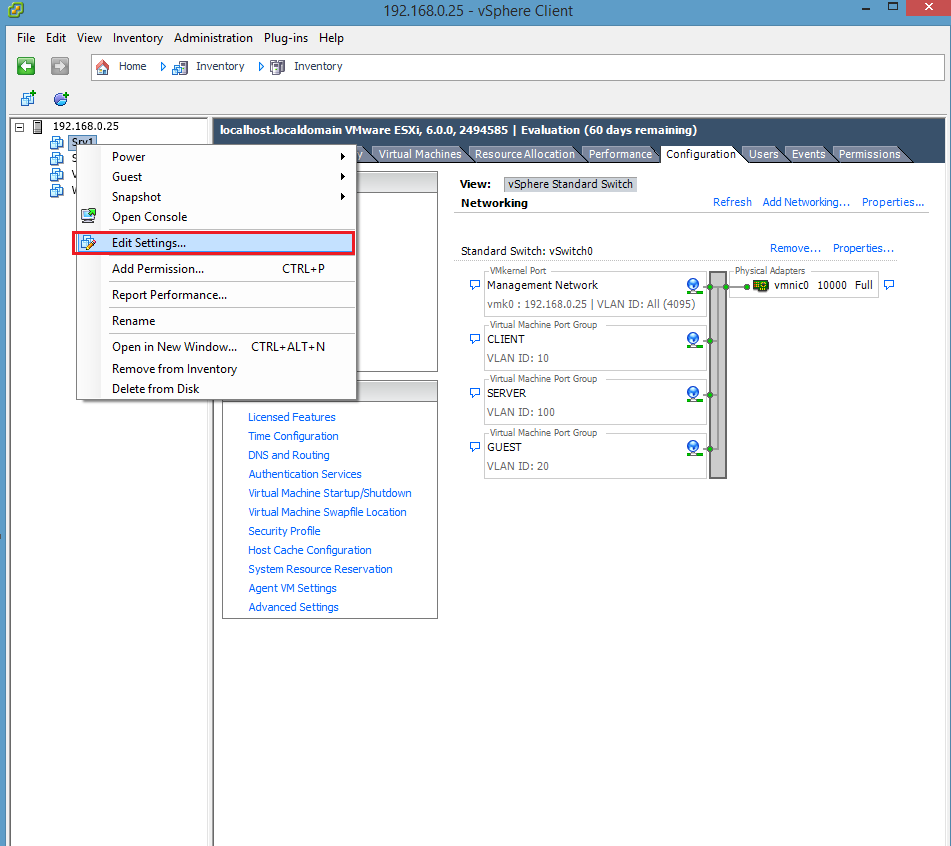
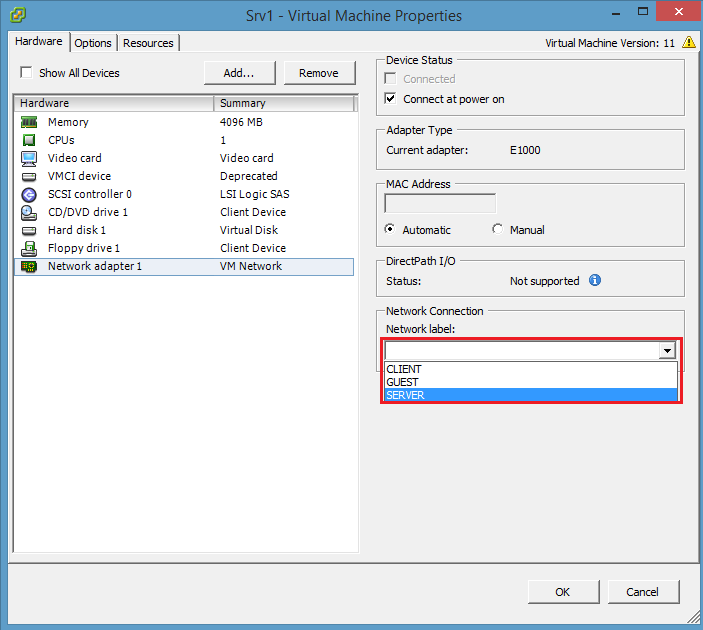
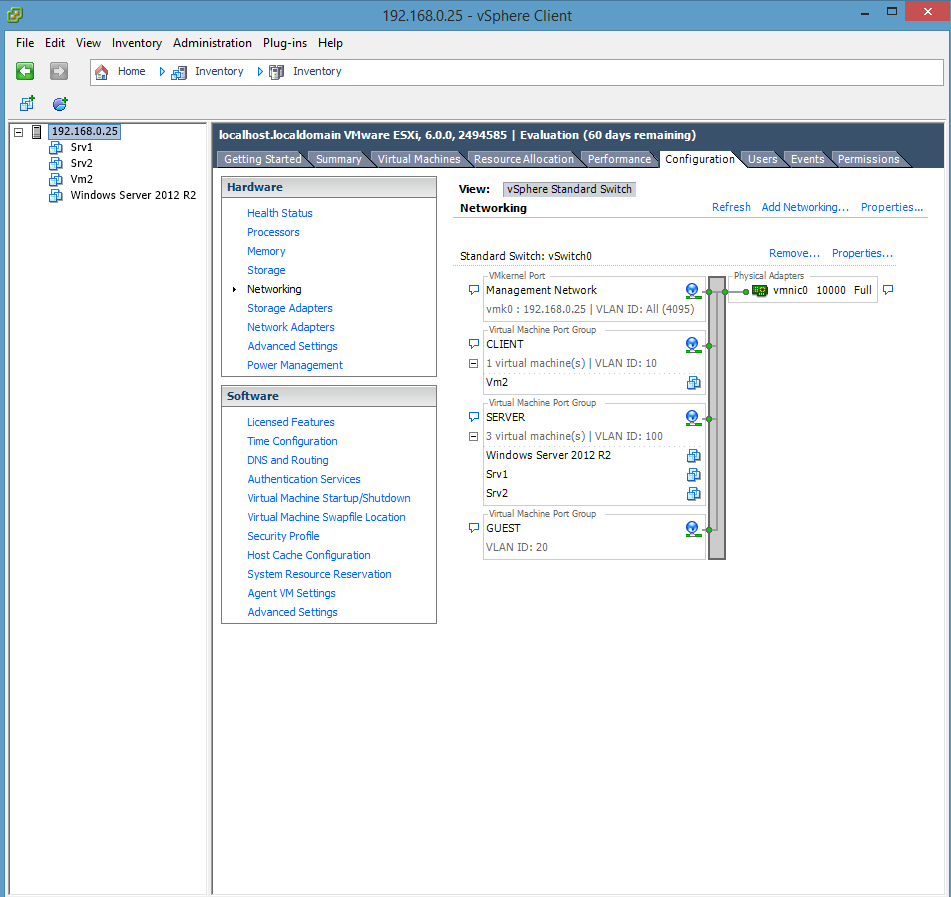
Let’s assign the VLANs to the virtual machines:
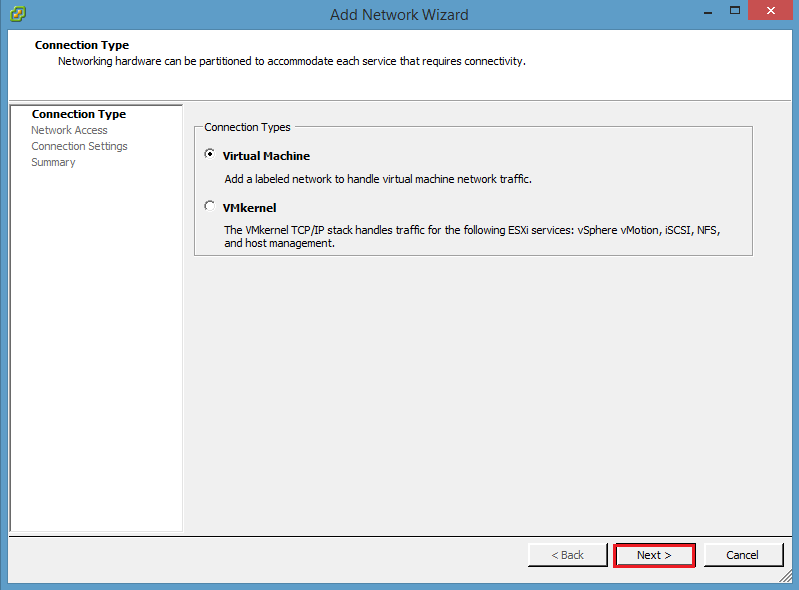
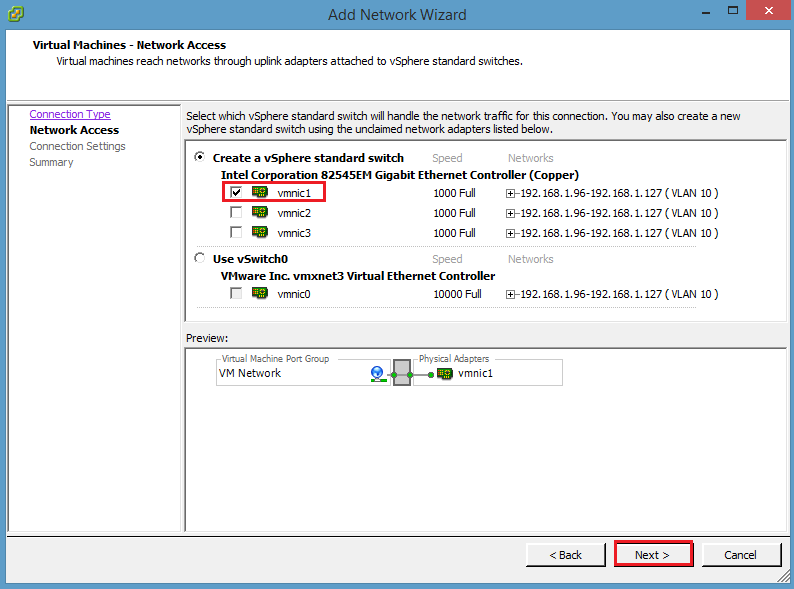
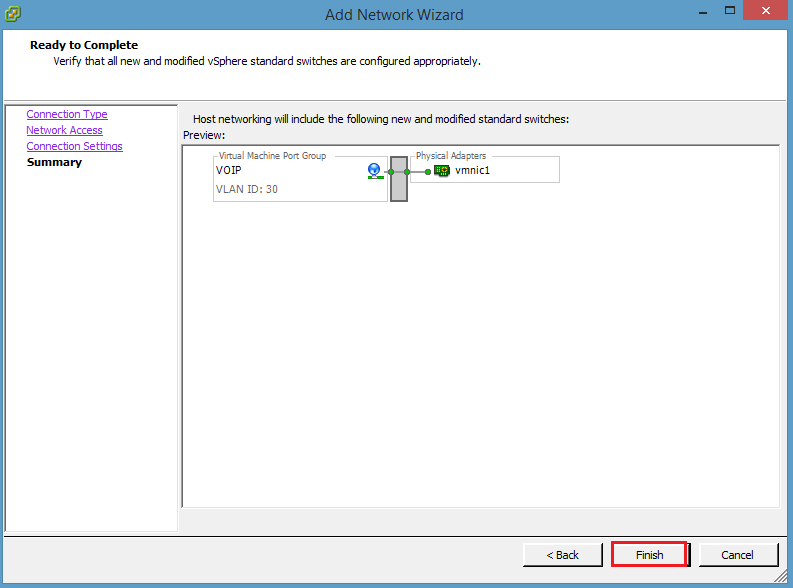
The final step is to add a second virtual switch using another network adapter. You must specify the VLAN ID of the desired network:
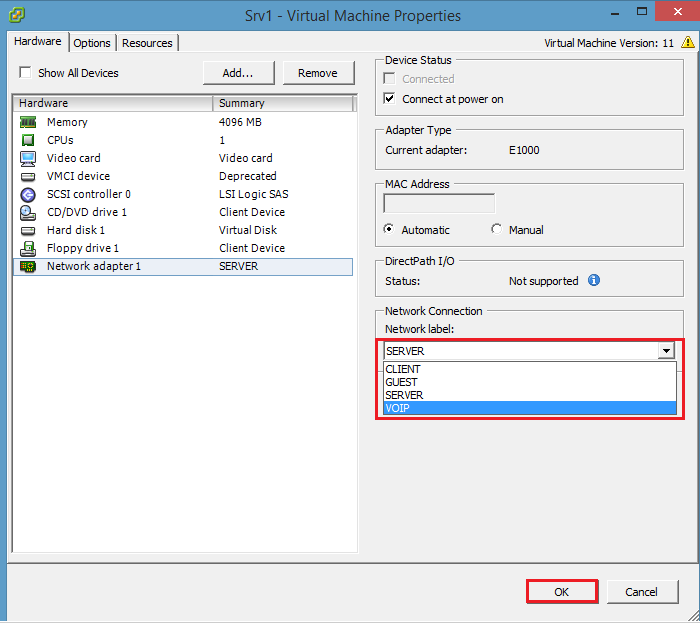
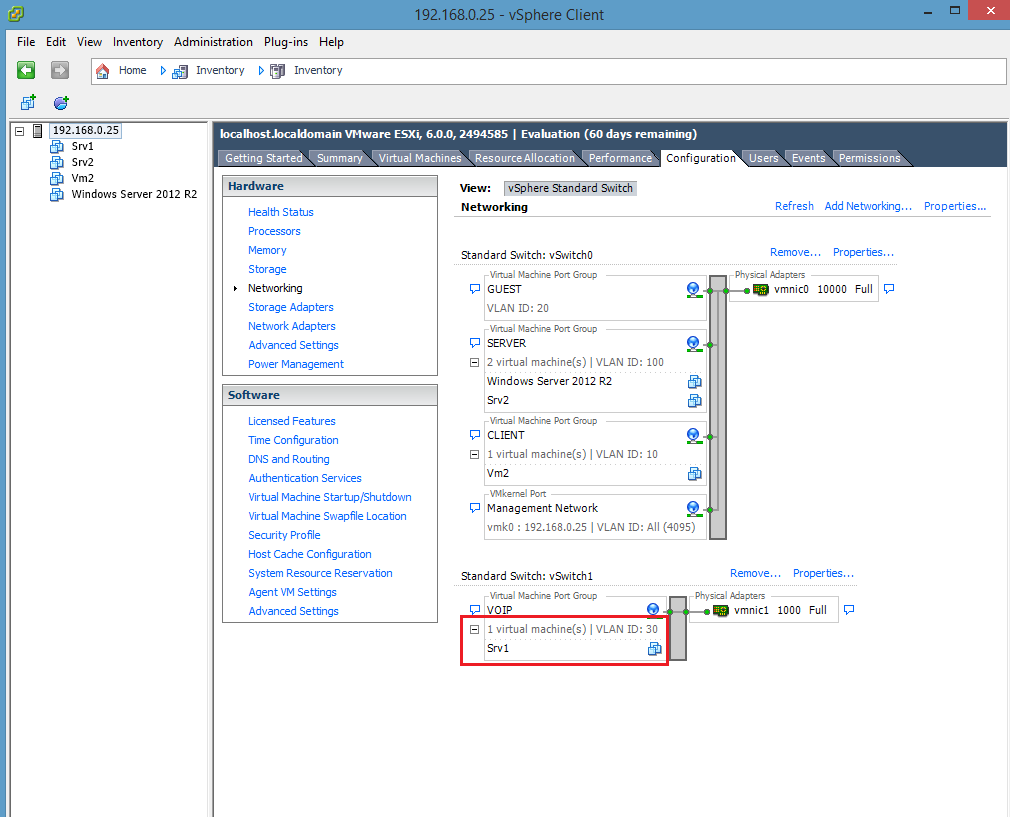
If we try to change the network of the Srv1 virtual machine from SERVER ID 100 to VoIP ID 30, we will see the VM automatically assigned to the second vSwitch:
Read related articles
A Guide to PowerShell – part 3
Welcome to part 3 of 3 of The Solving A guide to PowerShell. Check also Part 1 and Part 2.
A Guide to PowerShell – part 2
Welcome to part 2 of 3 of The Solving A guide to PowerShell. Click here for Part 1 and Part
A Guide to PowerShell – part 1
Welcome to part 1 of 3 of The Solving A guide to PowerShell. Click here for Part 2 and Part

